Project Log: Tuesday, March 4, 2014
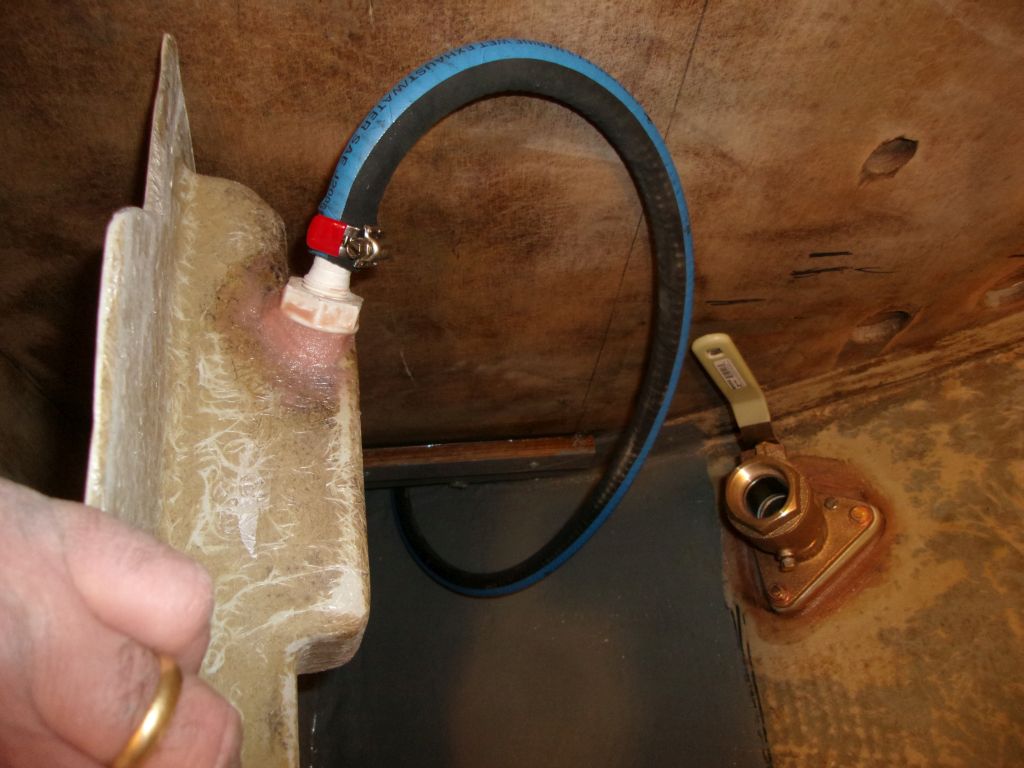
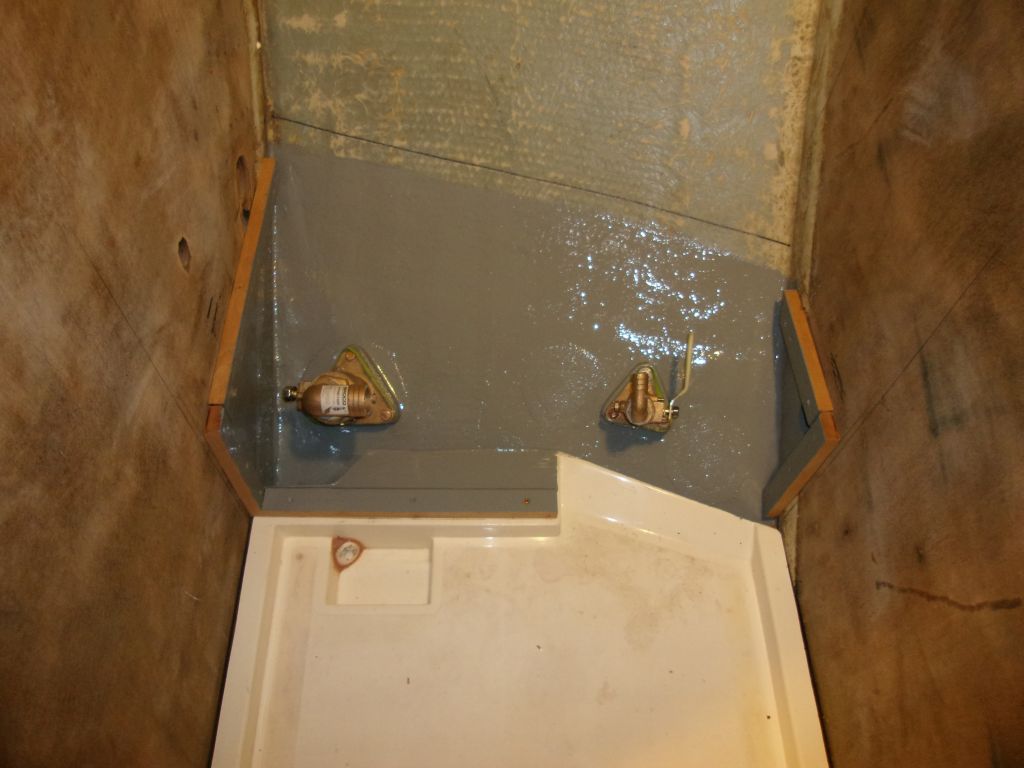
To install the shower pan/head sole, I first attached a
drain hose to the sump drain. To ensure longevity
of this hard-to-access (once the pan was in place) hose,
I chose hard wall 1/2" reinforced hose, which I led into
the compartment from beneath the after bulkhead; later
I'd run this hose to a sump chamber.
I had a tough time getting this hose over the plastic (Marelon)
hose barbs on the drain fitting, and in fact had to sand
away the barbs from the fitting in order to squeeze the
hose on at all. One of life's great mysteries is
why plastic hose barb fittings are always too big for
their supposed size, and good hose never fits well over
them. Anyway, eventually I got on enough of the
hose to securely clamp, which was good enough for this
non-critical installation.
|
 |
Access to this hose and fitting was theoretically
possible with the pan in place, thanks to a cutout in
the pan directly overhead, but of course it was tight
beneath and this wasn't something I hoped to ever have
to change. So to this end, I planned my final
construction in the head to be semi-removable, at least
to the point that it would be possible to someday remove
this pan without destroying it. |
 |
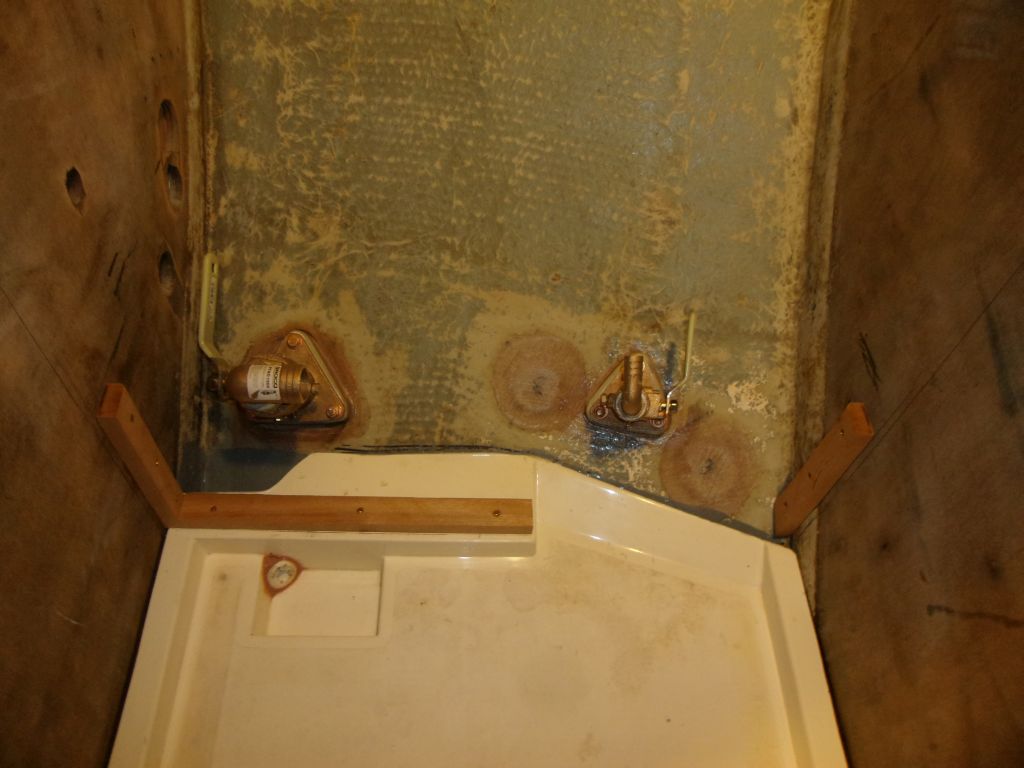
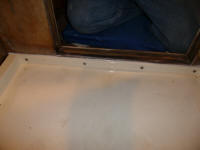
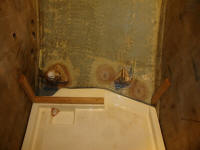
With new support cleats already in place, my first step
to install the pan was to screw it to the inside
bulkhead in the space. Because I was striving
towards a highly water-resistant (stopping short of
anything truly waterproof, if such a thing even exists)
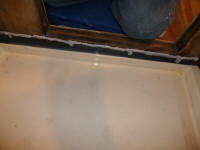
space, I applied a bead of sealant first, to seal the
seam between the shower pan and the bulkhead. I
had another plan for the two sides of the pan, at the
fore and aft bulkheads, but I'll get to that in a bit. |
 |
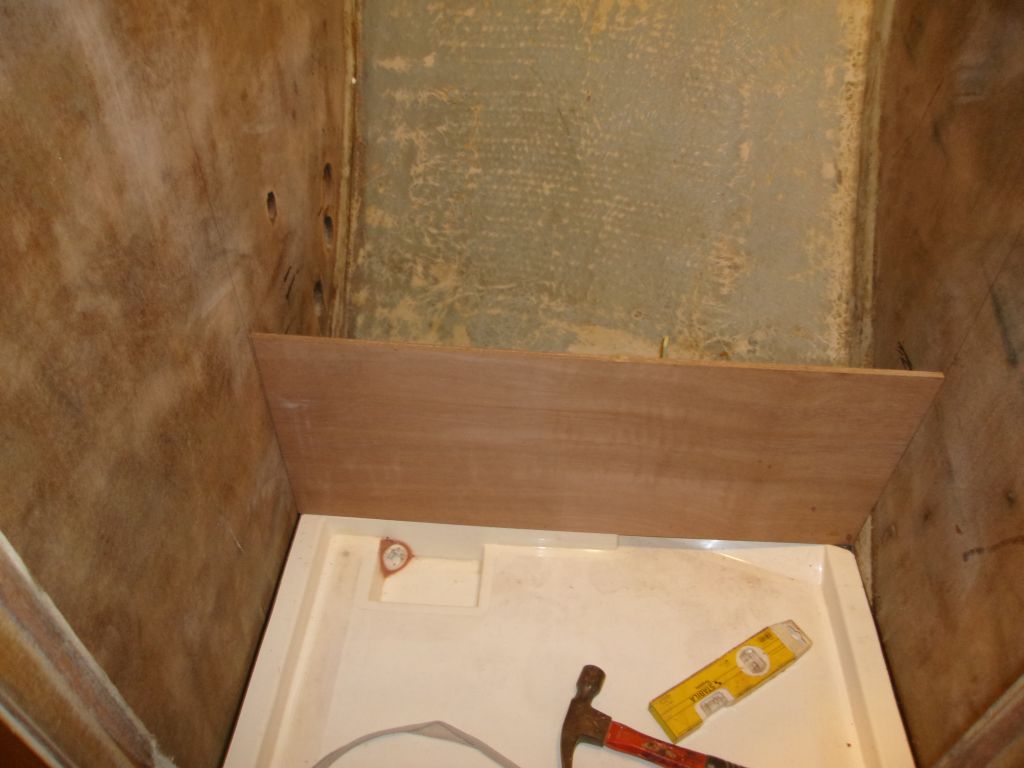
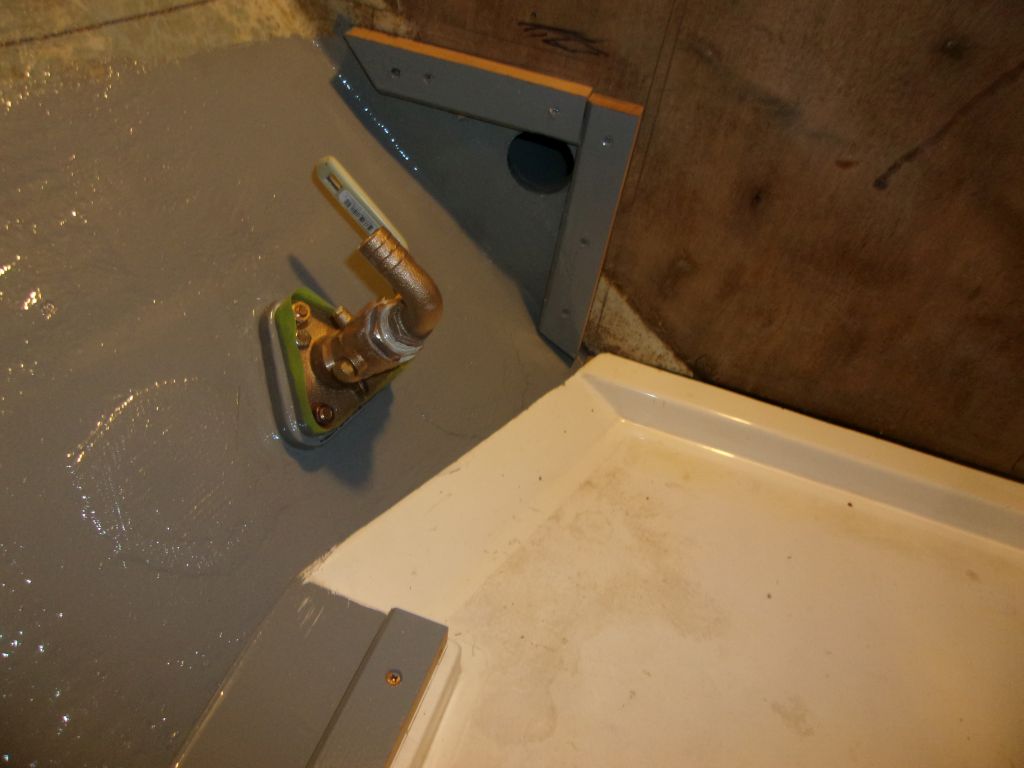
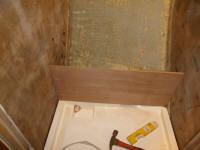
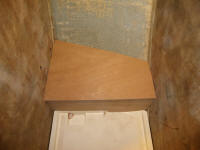
With the pan in place, I began construction of the head
platform itself. I started with some basic
layout, and the vertical panel, which I kept flush with
the small raised molded section of the shower pan above
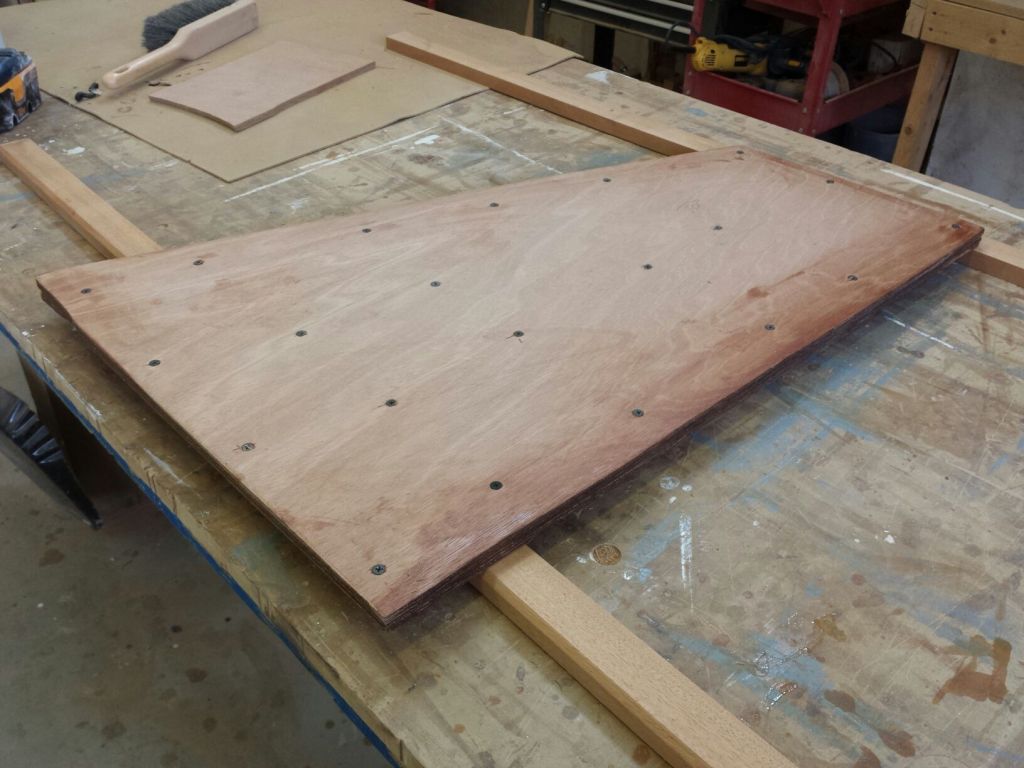
the sump. With an oversize 9mm plywood panel cut
to the correct width, I marked for support cleats
behind, which I cut and installed with screws--no glue
on these since having them permanently installed would
prohibit future non-destructive removal of the shower
pan. I scribed the base of the panel to fit the
contours of the shower pan, and, once I'd determined the
final height of the platform, keeping clear of the
seacocks, I cut the top of the panel at the correct
height and temporarily secured it with one screw (it was
otherwise a friction fit). |

 |
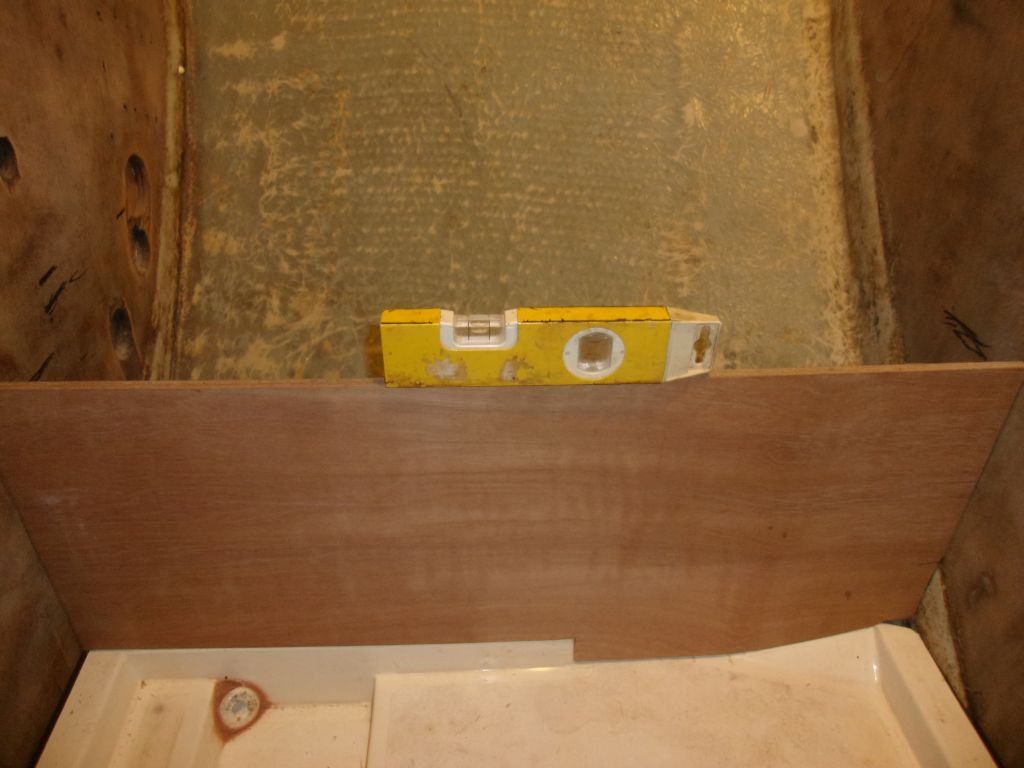
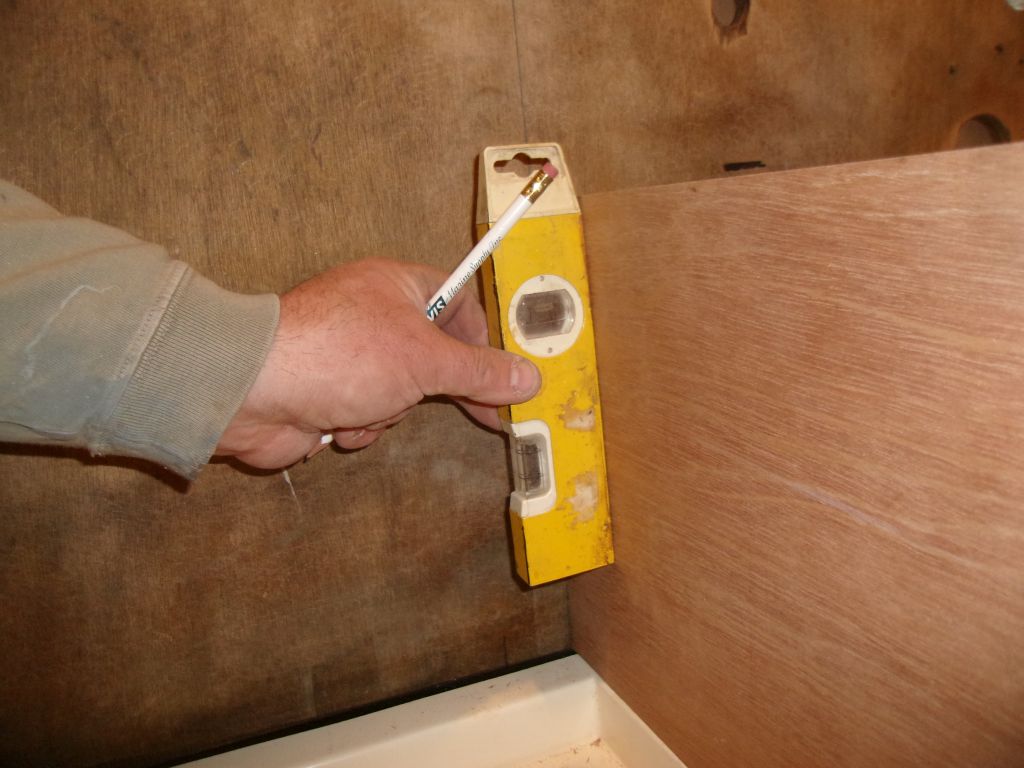
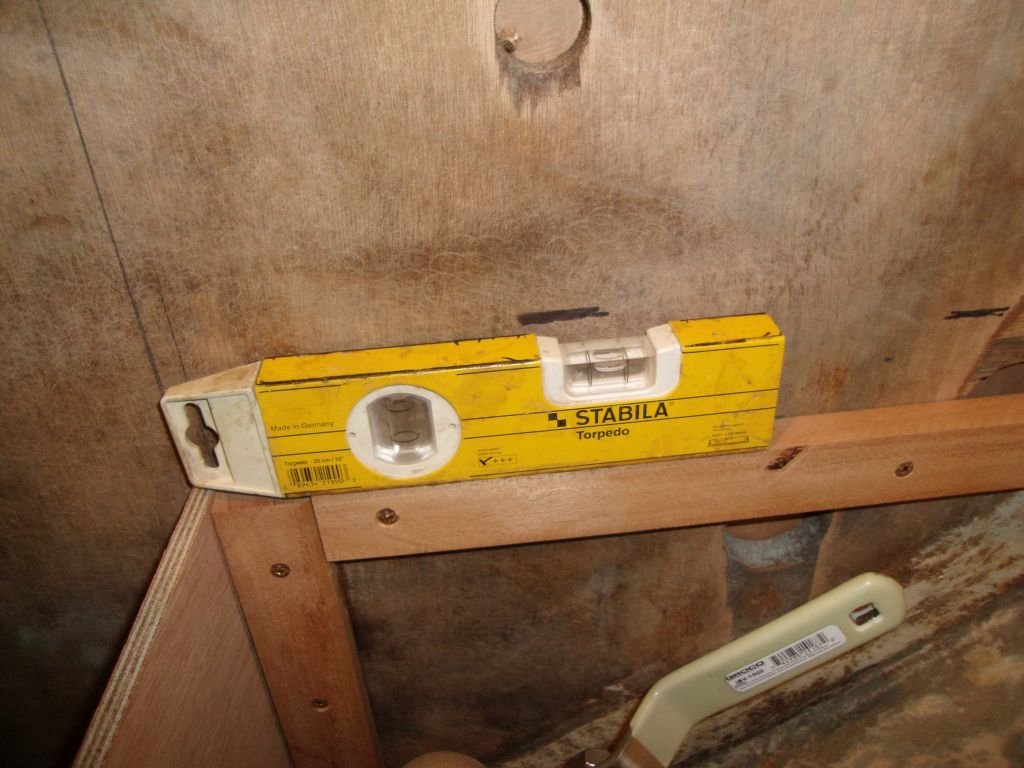
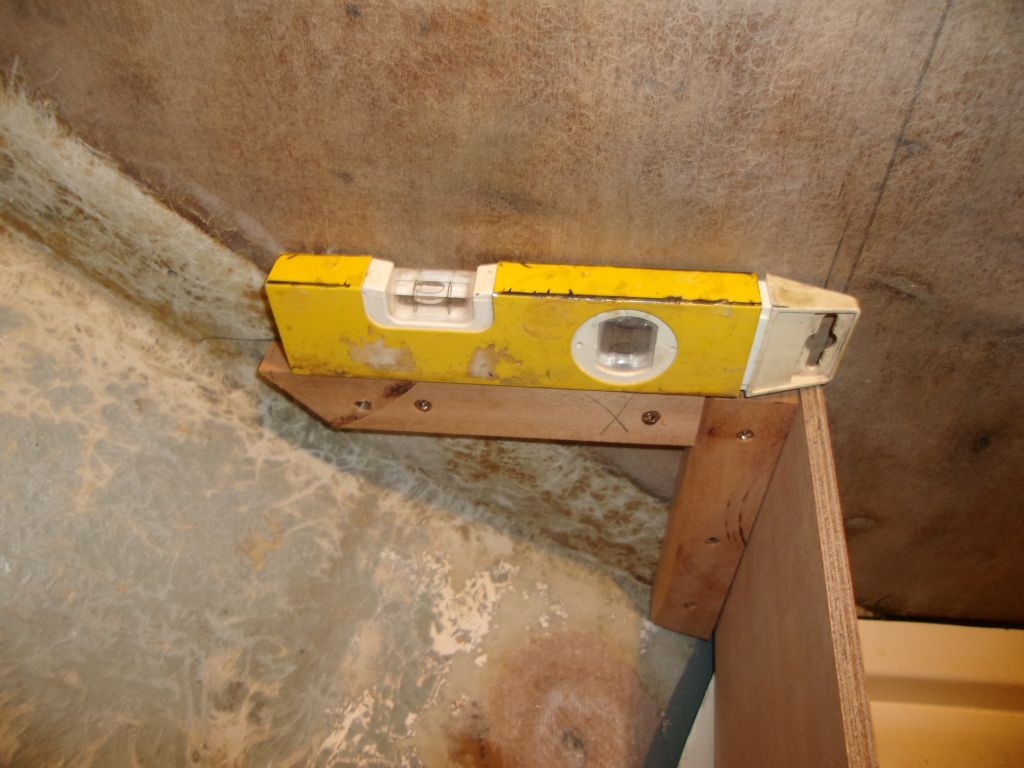
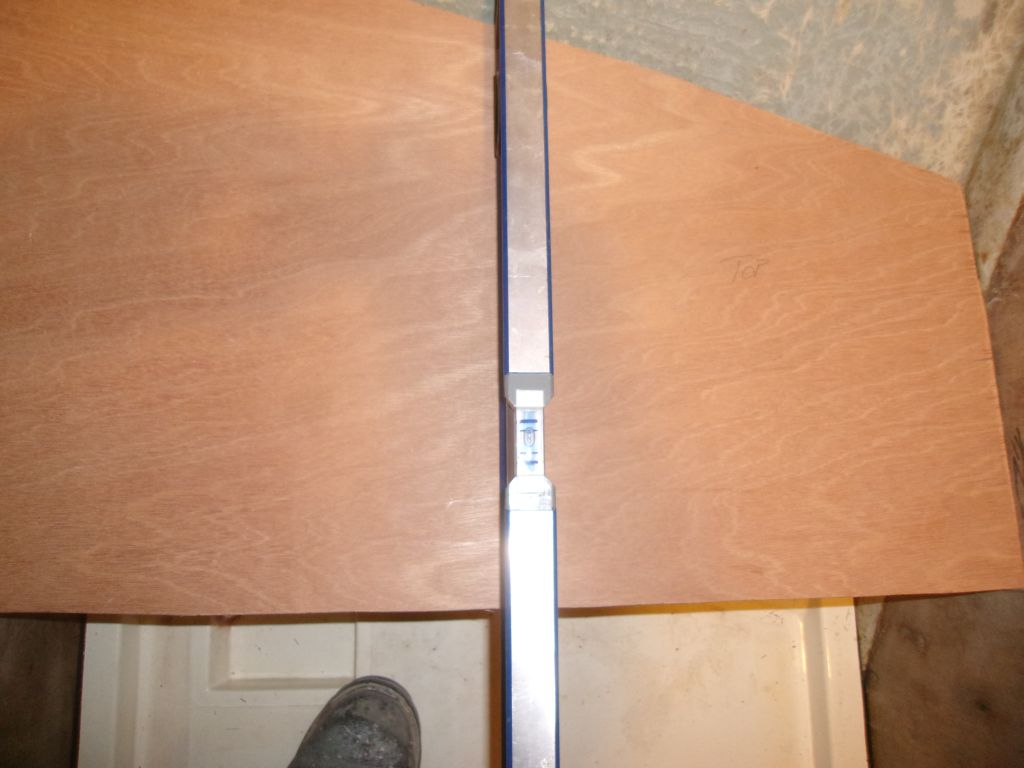
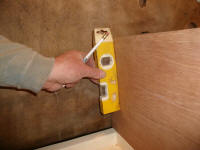
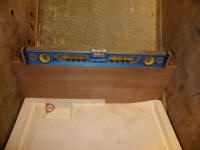
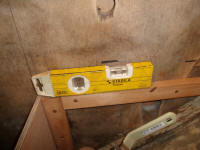
Now I laid out for horizontal support cleats fore and
aft, to support the platform itself. I installed
the cleats with a slight angle towards the centerline of
the boat, so that the platform would tend to shed
bathing water rather than collect it--note the bubble
just off center. This translated to about 1/16"
out of level over the length of that torpedo level, or
perhaps 1/8" higher at the outboard end of the platform
versus the inboard edge. |
 |
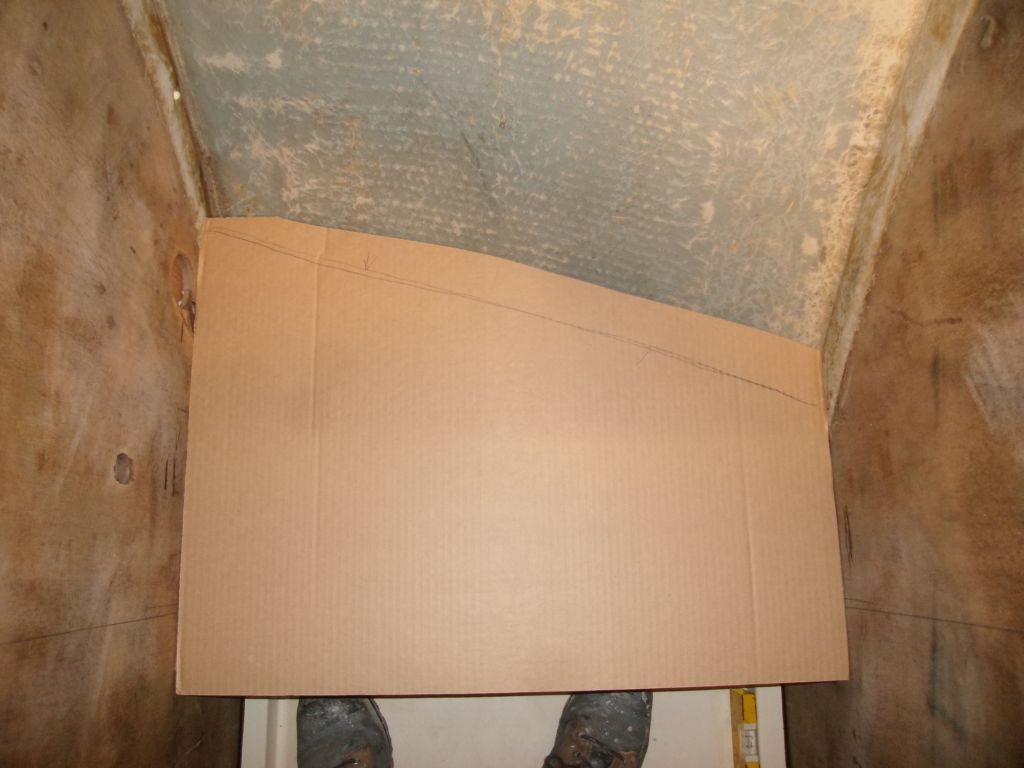
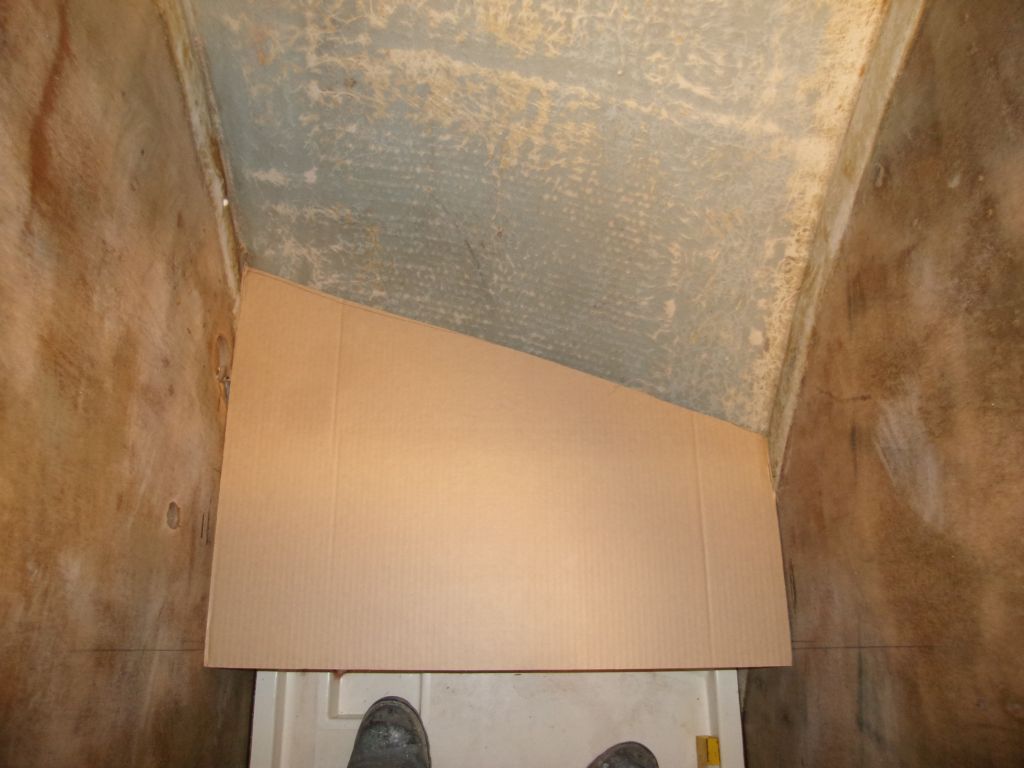
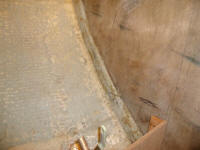
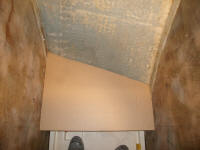
Starting with a cardboard template roughly cut to
approximate the shape of the space, I scribed to the
shape of the hull, then transferred the shape to the
first of two layers of 9mm plywood. To be strong
and self-supporting, the platform needed to be at least
3/4", but the only plywood I had on hand was the 9mm, so
two laminated layers would do the trick and in fact be
stronger than a single, thicker layer.
After a couple minor manipulations, the panel fit
against the hull, and I trimmed the inboard edge to be
flush with the vertical panel beneath. |

 |
Then I transferred the shape to another piece of
plywood, and cut out the top layer. |
 |
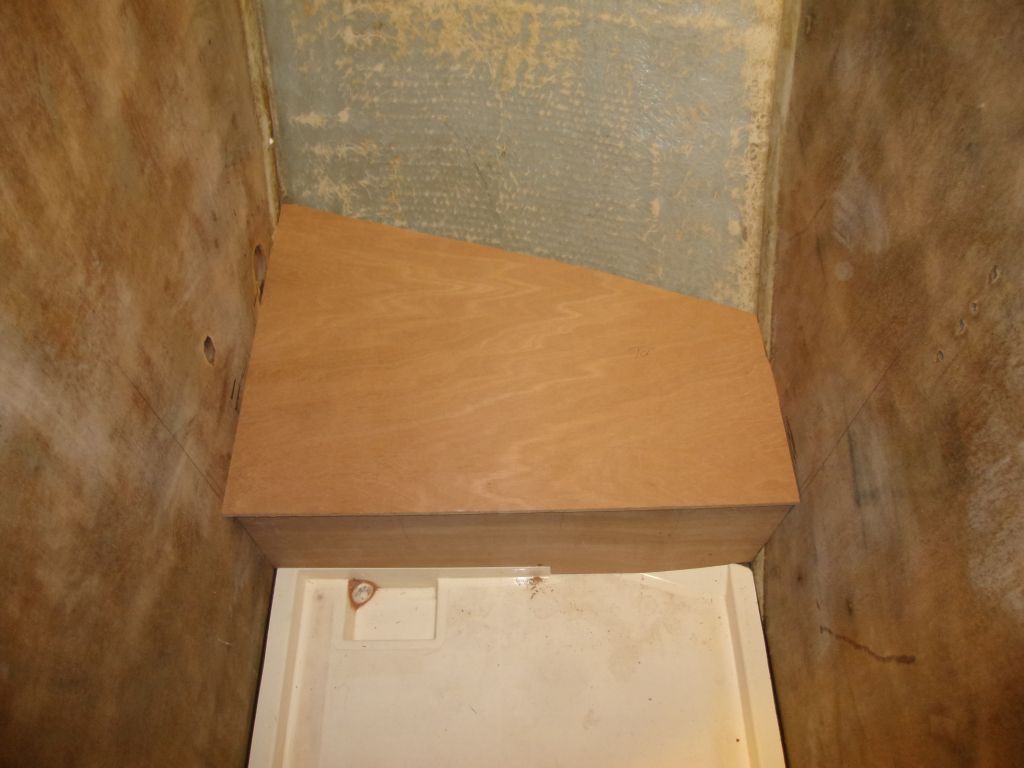
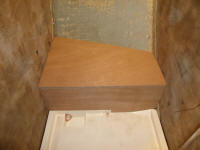
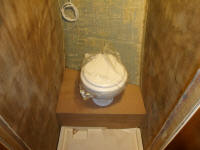
I selected a Lavac Popular manual head, and now gave it
a quick test-fit on the generous platform to see how it
fit. Ideally it might have been nice to have the
platform a bit lower, but the finished height as is was
pretty OK. The head compartment itself was very
comfortable and generously-sized, with plenty of floor
space. |
 |
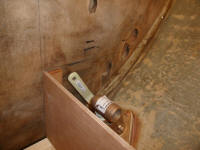
For access to the seacocks below, I planned a pair of
access hatches, to be located either in the vertical
panel (my initial thought) or possibly on either side of
the head in the flat panel, which location would be much
more convenient for operating the seacocks. Either
way, I'd prepare the openings for these hatches before
final installation.
With the two panel sections complete, I laminated the
two sections of plywood together with epoxy, securing
them temporarily with screws till the epoxy cured. |
 |
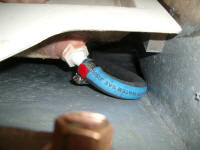
To round out the day and prepare for final installation,
I painted the area beneath the platform, after first
drilling a hole in the forward bulkhead through which
I'd run the discharge line from the treatment unit. |

 |
| |
Total Time Today: 6.25 hours
|
<
Previous | Next > |
|
|