Project Log: Friday, February 4, 2011
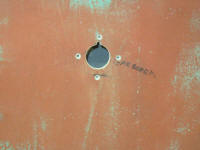
Before continuing with the aft fuel tank platform
installation, I decided to prepare for the installation
of the new bronze garboard drain, which I now had on
hand. I thought it'd be easier to clean out
sawdust or debris from drilling the hole before the tank
platform limited access to the space.
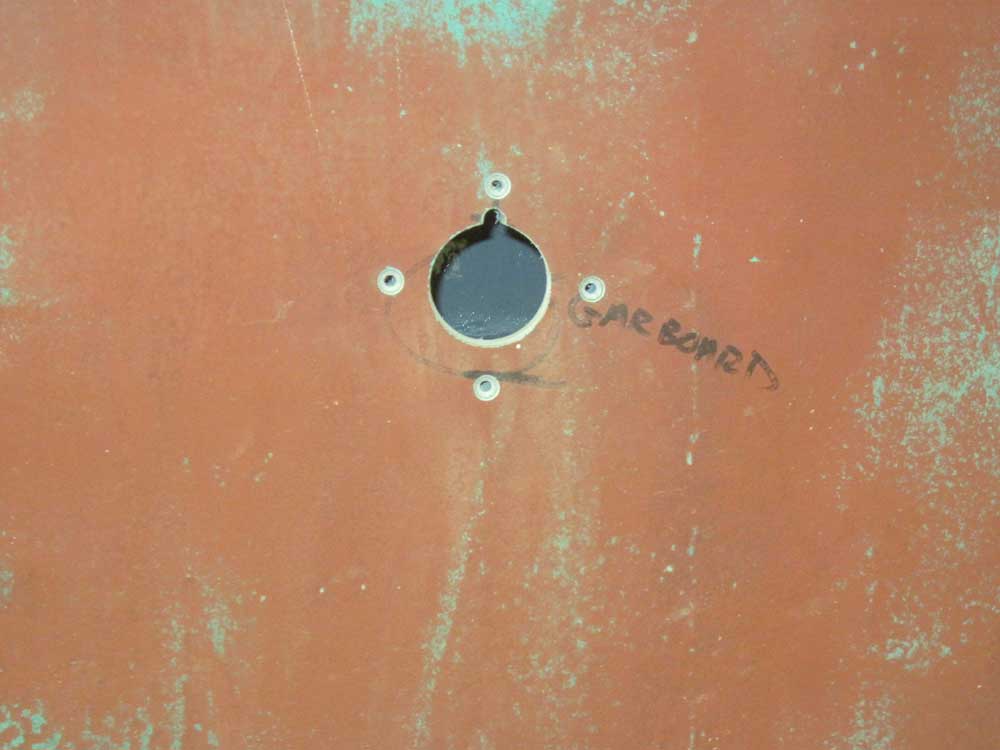
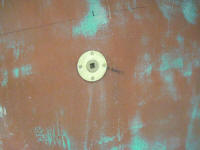
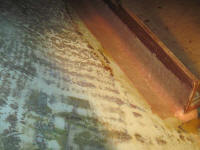
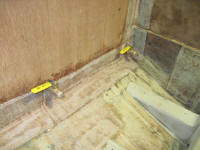
At my previously-marked pilot hole, I drilled a 1-1/2"
hole for the drain fitting, which required just a bit of
enlarging with a drum sander (the proper hole saw would
be 1-9/16"--this for my future reference). The
fitting featured a key that required drilling a small
slot adjacent to the main hole.
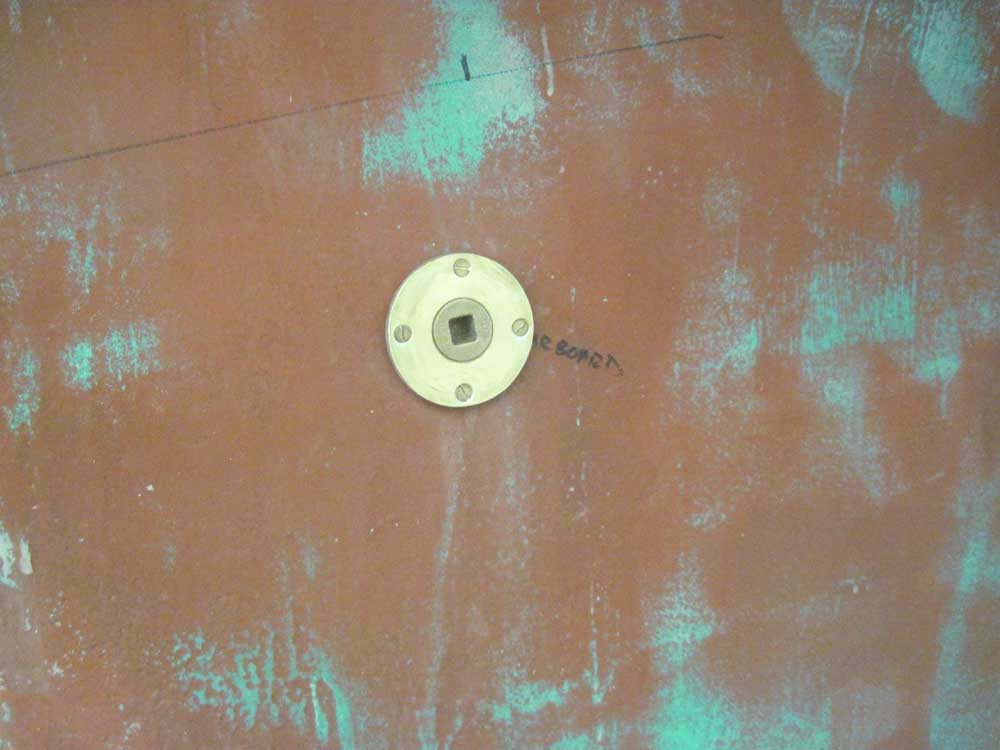
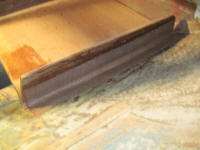
When I could slip the fitting in, I drilled pilot holes
and tapped for 10-24 machine screws, along with small
countersinks at the surface for sealant reservoirs.
I tested the fit dry before removing the fitting for
storage till I installed other through hulls in the
fairly near future, when I'd install this as well.
(I didn't have the sealant I like to use for through
hulls on hand, which is why I didn't install the fitting
right now.) |
 |
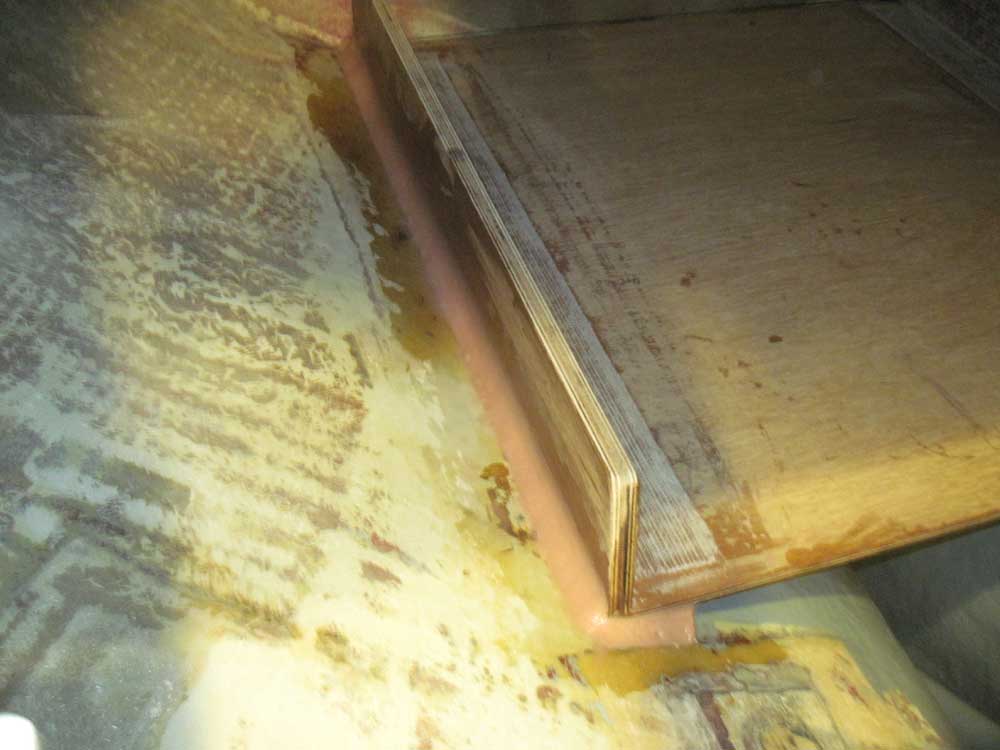
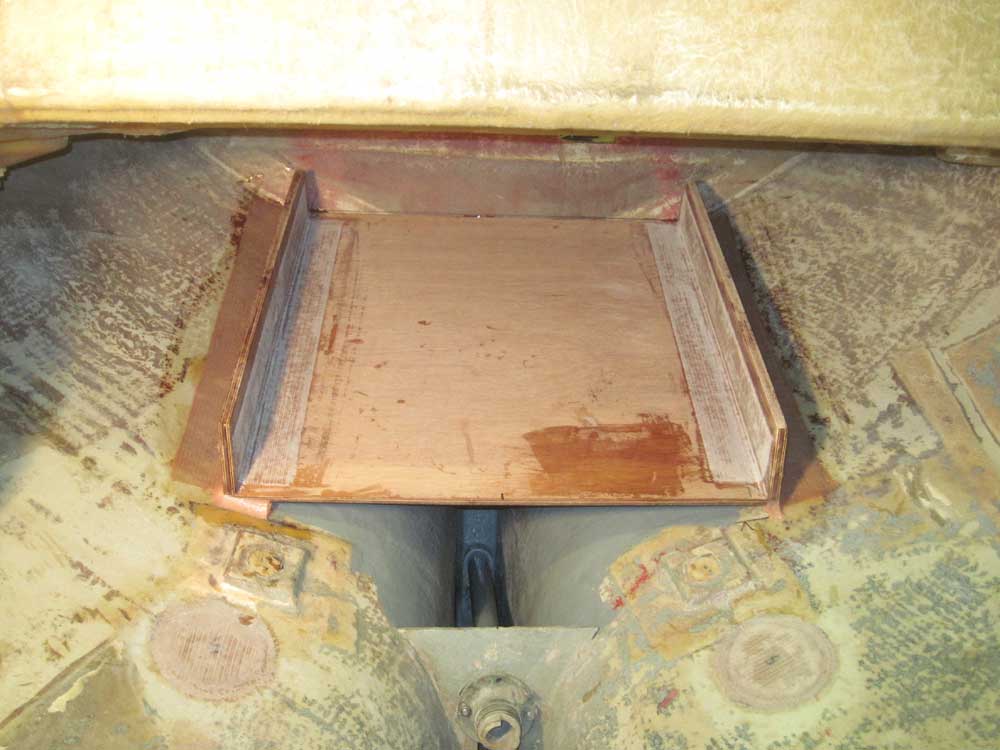
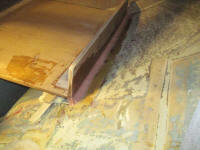
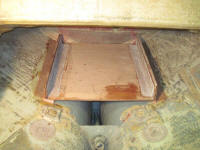
I washed the newly epoxied underside of the aft fuel
tank platform, then lightly sanded the outboard edges,
where it'd be bonded to the hull. Thusly prepared,
I put it in position and held it lightly with a few
tacks of hot glue; I'd originally planned to run beads
of my habitual 3-hour epoxy adhesive beneath the edges
to initially secure the platform, but the shape of the
hull was such that the platform only rested on the hull
at the forward and after corners, so I used the hot glue
just to hold the platform in place while I mixed and
applied thickened epoxy beneath the edges of the
platform and to create wide fillets between the platform
and the hull.
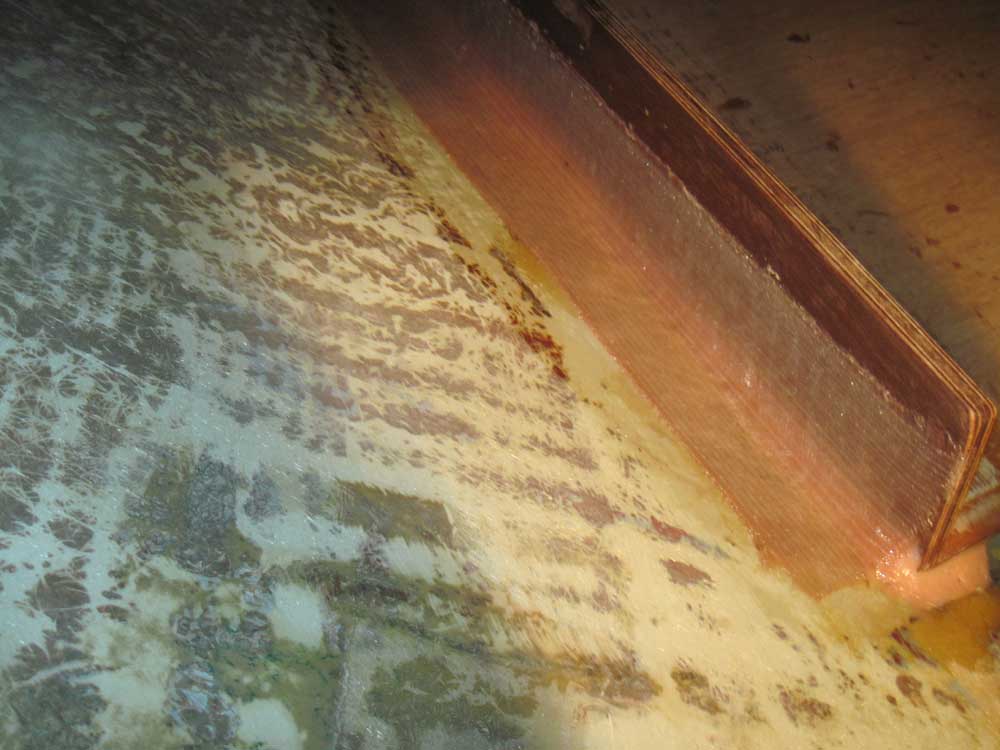
To level the platform, I added some temporary shims to
the forward port corner, since when this bore directly
on the hull the platform was out of level and slightly
twisted. I held the shims well inboard from where
the epoxy work would be going on so I could remove them
later. |
 |
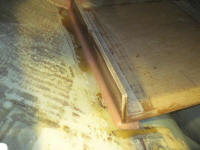
Later, when the fillets had partially cured, I installed
two full-length layers of biaxial tabbing between the
platform sides and the hull to secure it in place.
Once the tabbing cured, I'd probably go back and install
a fillet and layer of tabbing at the back edge of the
platform, against the small bulkhead near the transom,
just to provide a clean, dry seam there. |
 |
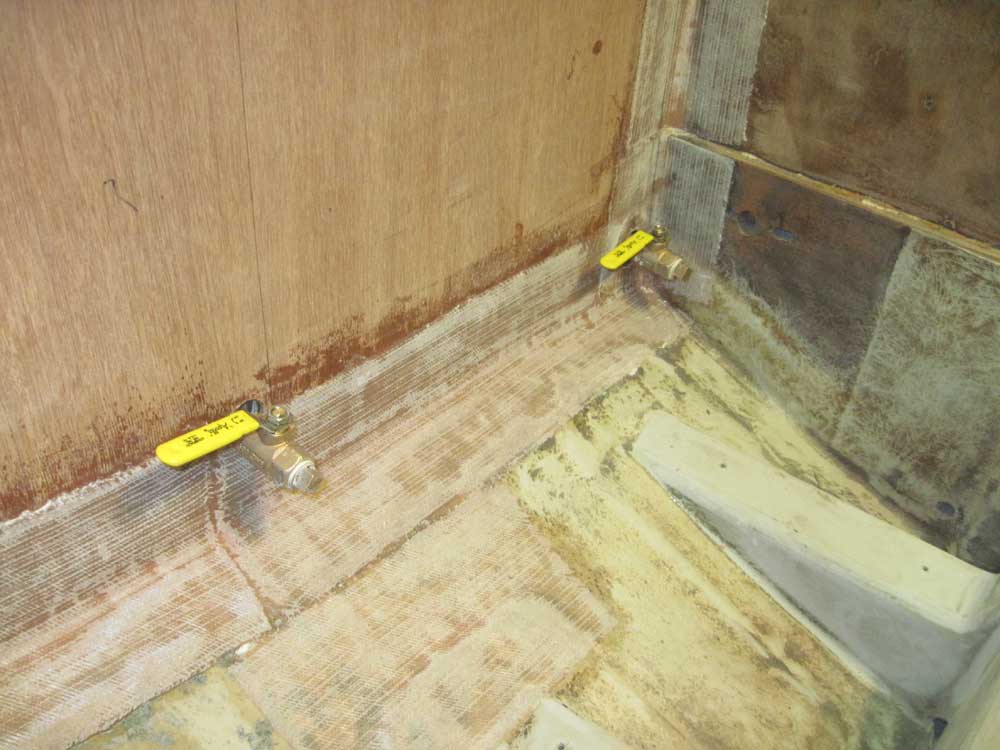
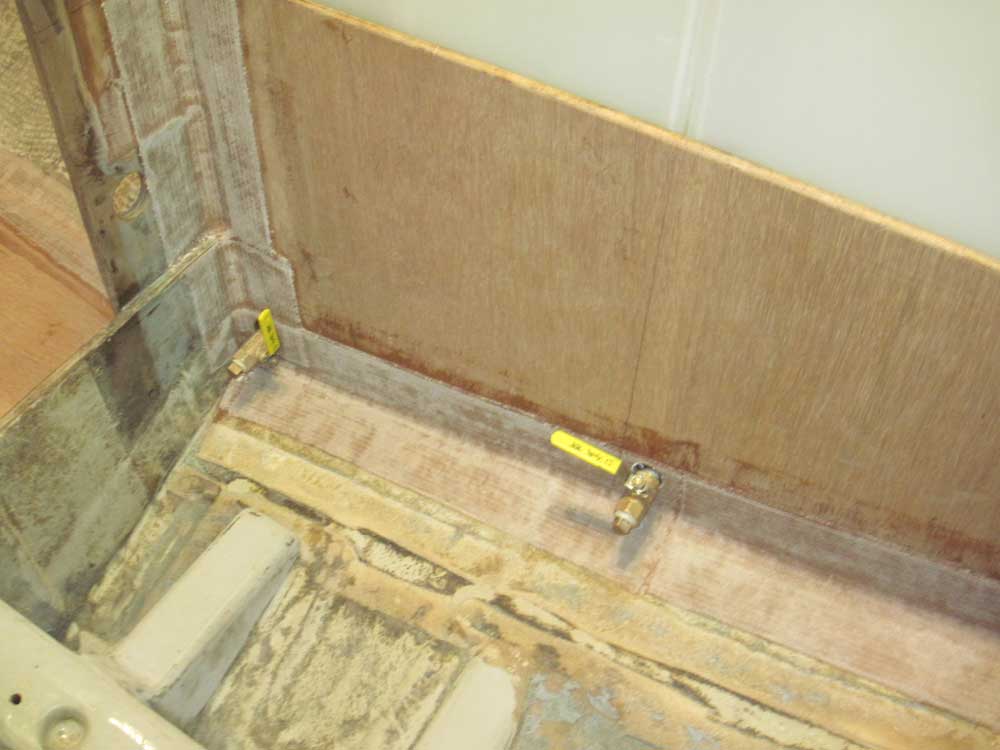
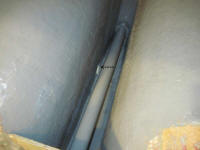
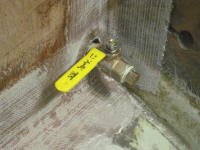
Now equipped with a selection of 2" pipe nipples and
bronze shutoff valves, I continued with the engine room
wing tanks. Earlier, I'd run a 1/2" NPT tap
through the tapped drain holes in the tanks to clean up
the threads, and after applying thread sealant compound
to the various parts, I assembled the valves with a pipe
nipple on one end and, for added security should one of
the valves be accidentally opened, a bronze plug in the
other end.
Then, I threaded a completed assembly into each of the
four tank drains through the bulkhead holes I'd drilled
earlier. I wanted these valve assemblies in place
now so that when I foamed the tanks into position,
there'd be no chance of foam creeping into the drain
holes or blocking access.
I planned to arrange some sort of covers for these
valves so that they wouldn't be susceptible to damage
from being stepped on when working in and around the
engine room, now and in the future. |

|
Total Time Today: 3.25 hours
|
<
Previous | Next > |
|
|