Project Log: Saturday, October 15, 2011
Earlier in the week, my countertop material, which I'd
special-ordered, arrived at the store, so with this now
on hand I could continue work on the galley. My goal for
the day was to install the countertop permanently, but
before I could do so there were a number of items to
take care of first.
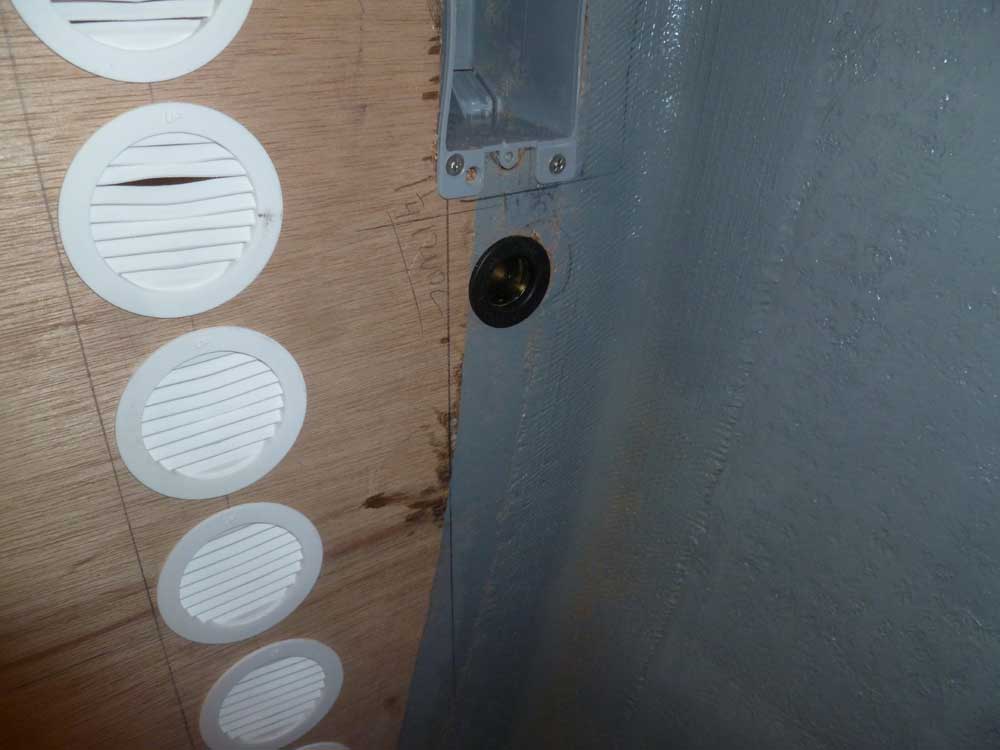
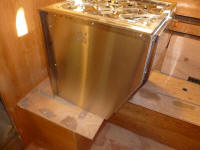
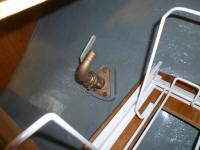
A 12-volt outlet receptacle that I needed for the
refrigerator had arrived during the week, so to begin I
installed this--a task that would be possible with the
countertop in place, but was assuredly easier first.
One of my goals in boatbuilding is never to install any
systems that I can't reach and service from within the
confines of the finished boat, and to this end I
typically wait to install systems till late in the
process: if I can install it in and around the
challenges of cabinetry and other obstructions, then I
can remove and service it similarly.
Here, however, I'd made provisions for access in the
future, but saw no reason not to take advantage of the
wide-open access that was available at the moment.
While I was at it, I connected a pair of wires to the
back of the receptacle, which I'd later hook up to the
power supply through a terminal block. |

 |
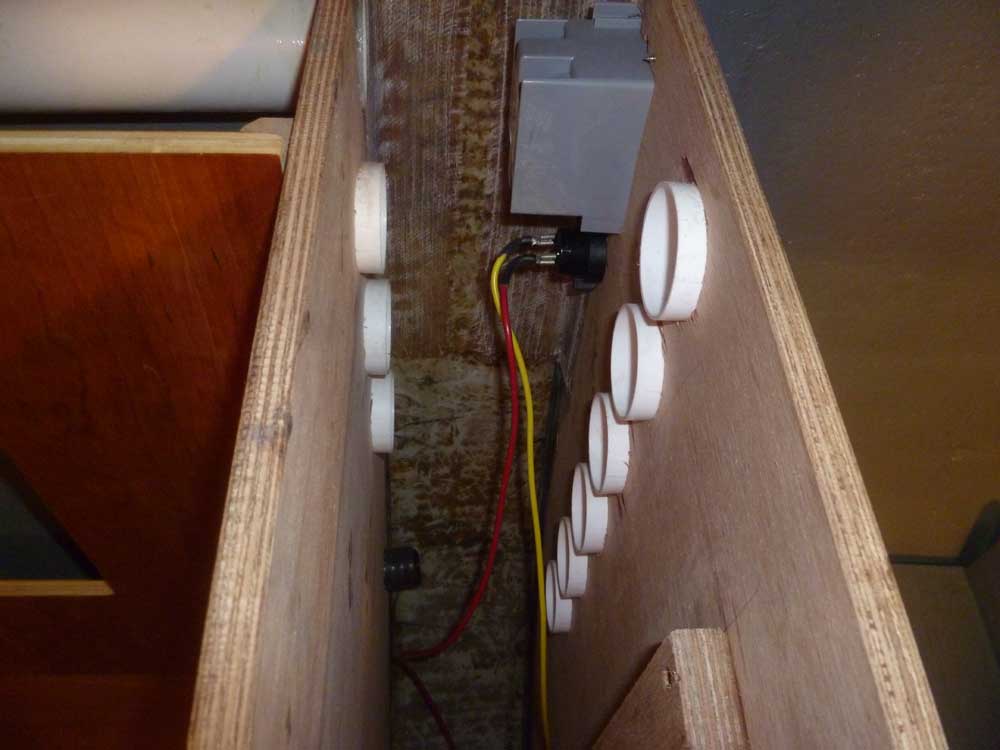
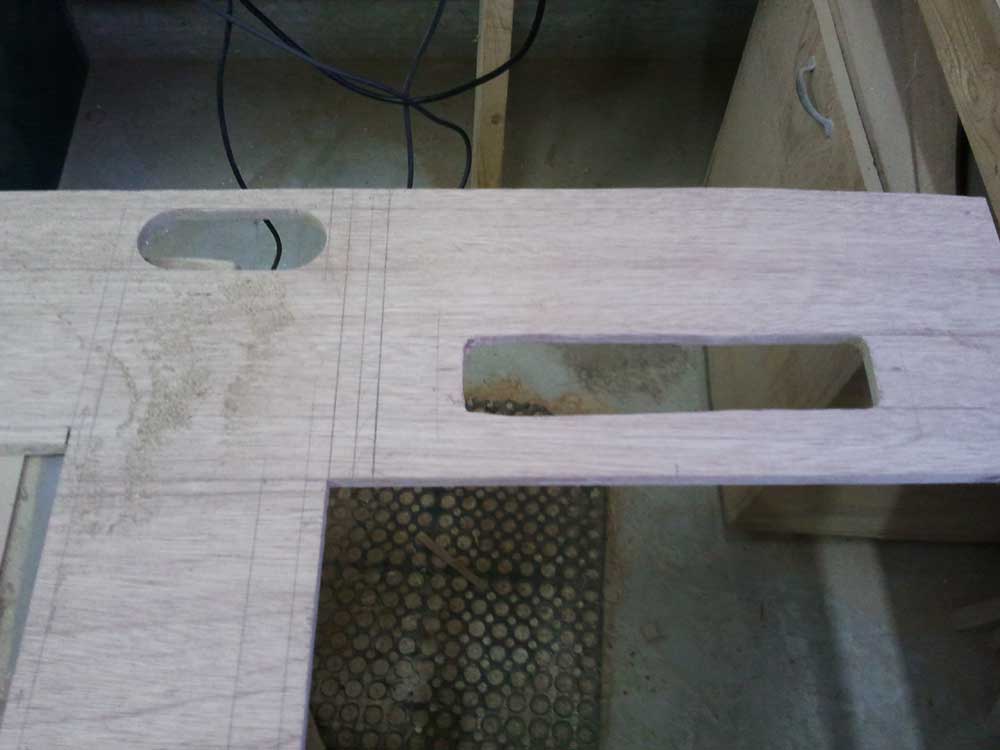
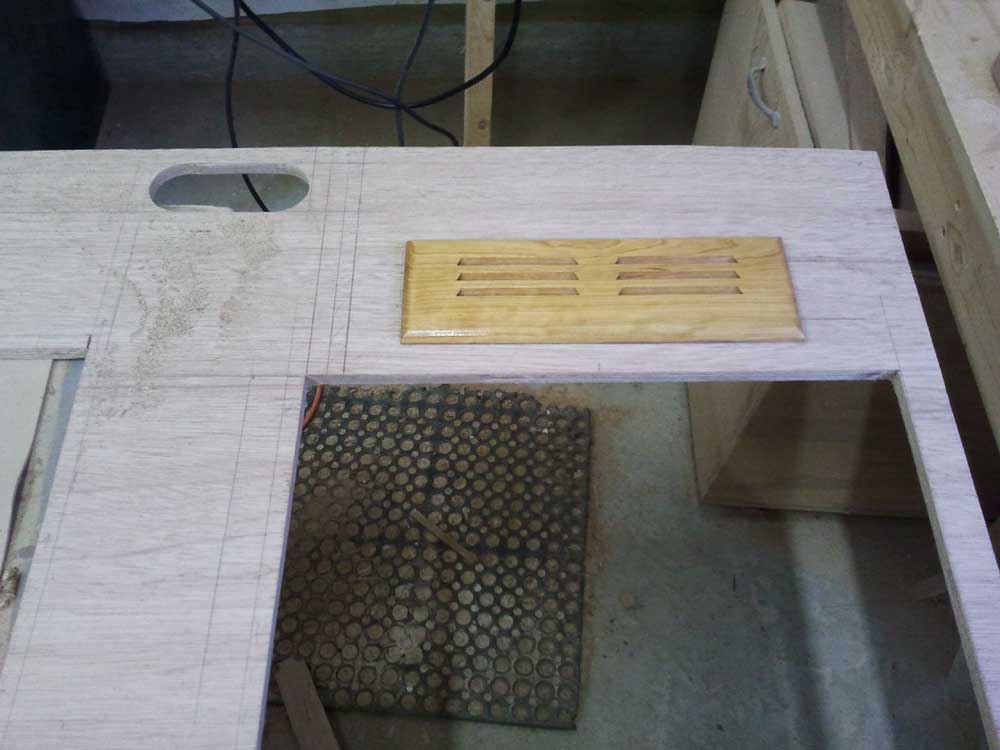
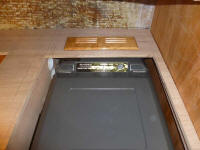
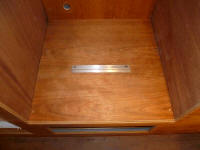
I wanted to install another ventilation port above the
back end of the refrigerator, in the countertop itself.
I'd purchased a cherry wood louver for this purpose, and
now I laid out the position where I needed it to be,
keeping in mind the fact that I needed room against the
hull for a planned wire/hose run space between the
engine room and starboard side of the boat.
This all worked out happily, and not unexpectedly, and I
made notations on the plywood countertop where the vent
would go so I could cut out the opening later, before
applying the countertop surface. |
 |
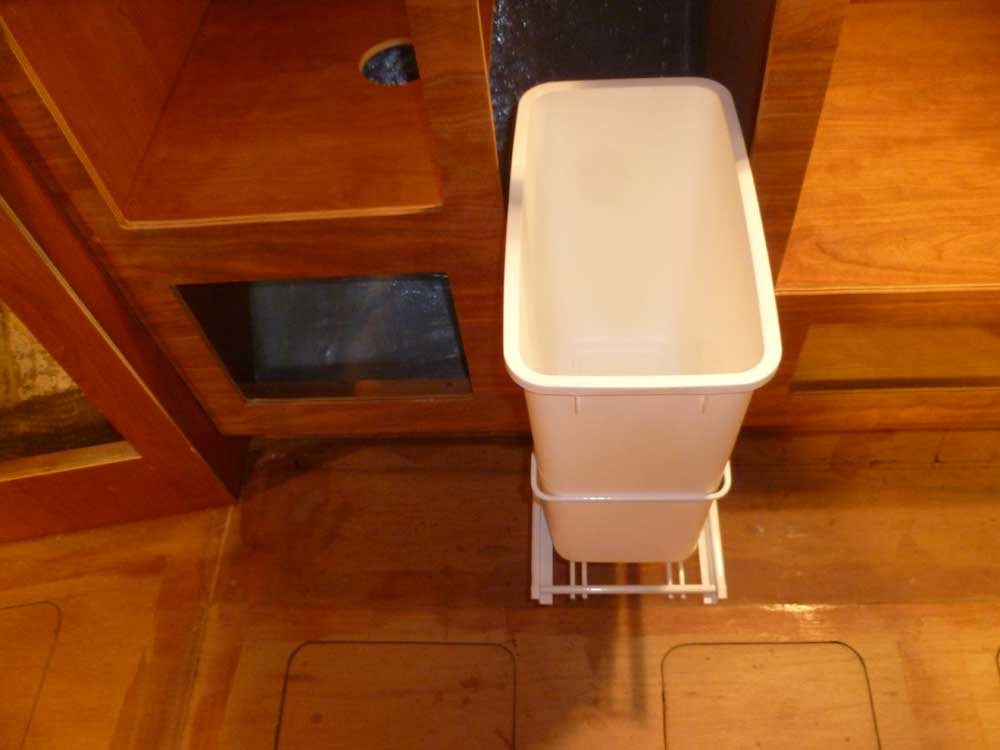
A reader offered me the suggestion for what he called a
"scraping block", which turned out to be simply a hole
through the countertop above the hidden trash
receptacle, through which one could dispose of trash,
vegetable cuttings, etc. without needing to always open
up the main trash bin door. I thought this was a
good idea, and simple enough to implement.
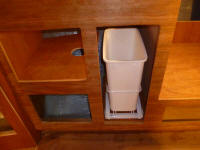
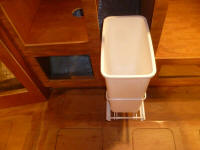
I installed the rolling trash can holder in its
designated spot, then made some reference marks above to
show where the mouth of the trash can was, so I could
locate the opening in the countertop above. I made
the necessary notations and left it till the countertop
was back on the shop floor for final preparations. |
 |
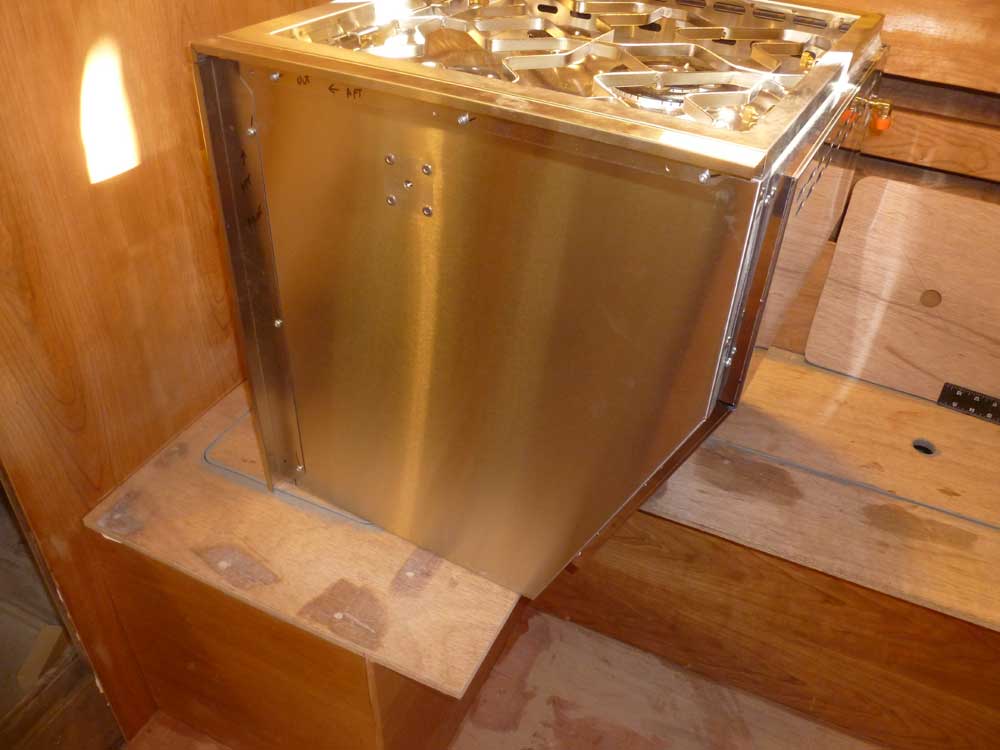
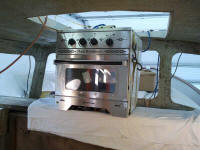
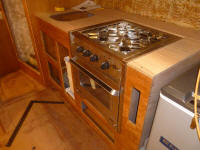
Before proceeding, I decided I ought to test-fit the
range and make sure the opening worked as I'd planned,
before I made the ultimate commitment to fitting the
finished countertop. Getting the range into the
boat turned out to be a complex procedure that ate up
half the morning: the stove was heavy, awkward,
and not something to treat casually. There would
turn out to be other (not completely unexpected)
complications along the way. With apologies up
front, I am afraid there are few pictures of the various
steps in the process.
After removing the temporarily-installed trim pieces,
and any other excess weight I could (only later did I
discover how the oven door came off, but at the time I
couldn't determine how, so I left in place), I puzzled
out the lift for a while. Though at the onset of
the project I'd had full intentions of building staging
and a permanent walkway to the nearby staircase in the
shop, I'd never found time or inclination to actually
complete this, nor (so far) a true need. I used a
large stepladder for access, and this was always
satisfactory.
Had I had a real staircase, getting the stove on board
would have been substantially easier, as I could lift it
well enough, but didn't want to try carting it up the
ladder because of its awkward shape and weight
distribution.
Eventually, I rolled a small section of metal staging
into position adjacent to the cockpit, and with the
platform at its highest level, lifted the stove from the
floor to the platform, about 4+ feet. From here,
I'd initially hoped to simply repeat the four-foot lift
and raise the stove to the cockpit, but found that I was
uncomfortable with the situation when I tried:
there wasn't an adequate sense of security.
Instead, I installed two ratchet straps around the
stove, and to these attached a length of sturdy line
that I ran to the cockpit. Then, standing securely
in the cockpit, I lifted the stove on board with the
line, and eventually grabbing the straps themselves to
maneuver the range out and up as needed. This
wasn't easy, but I got it done. I used
soft cloths to protect the boat and range.
Now I ran into the not-really-unexpected complication,
but one that I hoped I'd find some brilliant way around
once the stove was in hand: the stove didn't fit
through the doorway from the cockpit to the pilothouse.
I'd measured, of course, and knew the actual measurement
was too small, but sometimes it's possible to sneak
things through by twisting this way and that, and so
forth. Anyone who's moved furniture into houses
knows this. Unfortunately, that was not to be in
this case.
Instead, I had no choice but to lower the range into the
boat through the large overhead hatch in the pilothouse.
The last thing I wanted to do was manhandle this stove
further, but what had to be had to be. With some
difficulty, I managed to carry the range onto the deck
forward of the pilothouse, then set up a wide board
across the pilothouse, spanning between the forward
windows on each side. I had to dig a board out of
the woods, clean off the dirt and dander, and hoist that
into the boat too.
Finally, with a soft cloth covering the board, I lowered
the range through the overhead hatch, again using straps
and line to help control and hold it. This was
fairly easy. Once inside the boat, and resting on
the platform, I could easily lower the range to
pilothouse floor level, and then finally in to the main
cabin. |
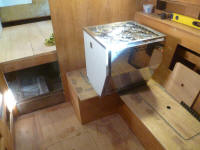 |
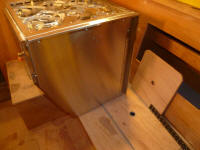
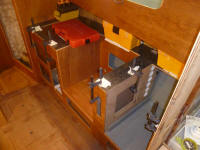
After cleaning up from that operation, I removed the
protective plastic from the sides of the range and
permanently installed the trim pieces. Then,
following the supplied instructions, I installed a
special hold-down plate on the floor of the stove
enclosure, which plate was designed to grasp a section
of the bottom of the range and prevent it from tipping.
The initial location I installed this turned out to be
wrong, a combination of a mistake on my part and equally
from a lack of clarity in the supplied diagram:
when I installed the range, I couldn't move it far
enough into the cabinet. Moving the plate back an
appropriate amount solved the problem, and I slipped the
range into place (temporarily). Everything fit as I'd
anticipated, which was good, and which had been the
point of this exercise all along.
Note that eventually the refrigerator cabinet front will
be covered with a door. |

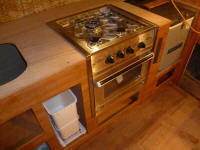 |
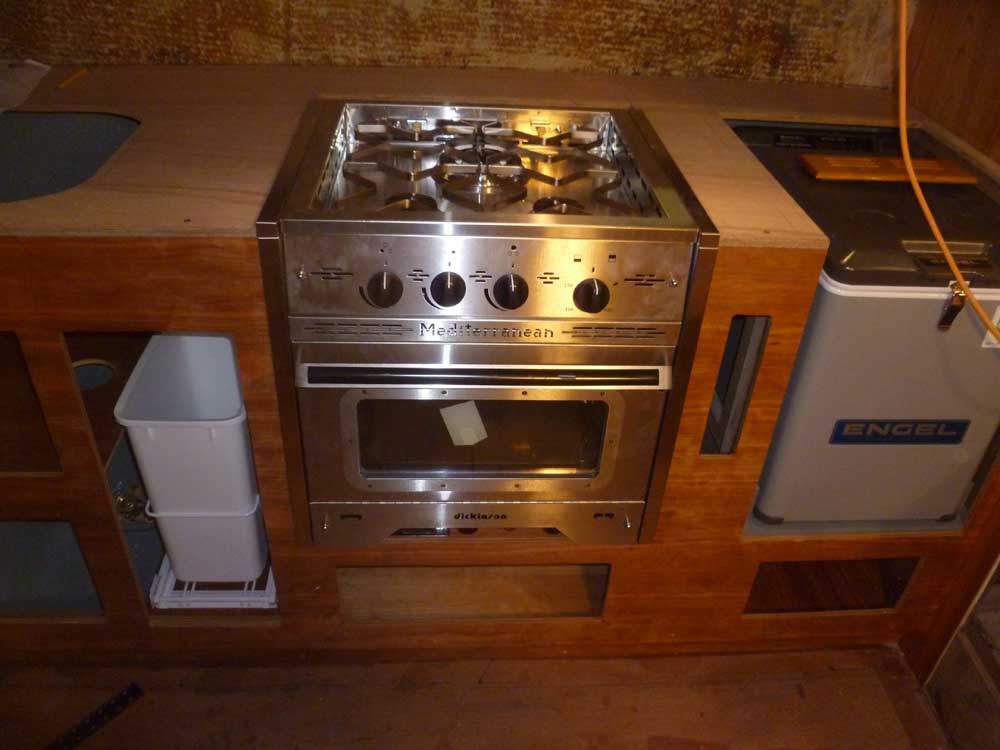
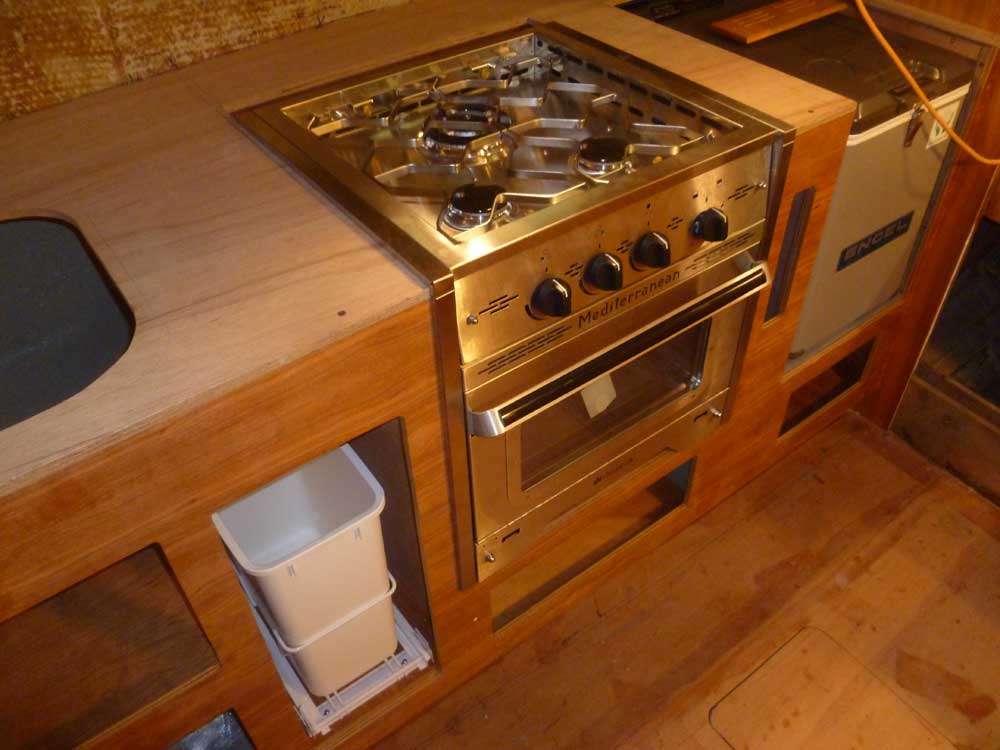
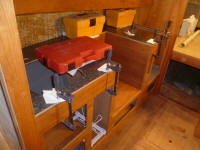
Other than ensuring the fit of the opening, another
reason I'd wanted to test-fit the range was to
double-check required clearances for the burners,
particularly as related to the position of any cabinetry
behind the stove. The required 7" clearance from
the center of back burner only brought me to the edge of
the range itself, so I'd have no trouble safely
installing cabinetry anywhere I so chose.
After removing the range (it wouldn't leave the boat
again), I test-fit the sink again and determined where
to drill a hole for the main faucet, a single-lever
pull-out item I'd purchased, then drilled the hole and
checked the fit of the faucet. Later, I'd
install a pair of simple faucets for the manual pumps
(fresh and salt), but could and would drill those holes
later; I didn't happen to have those faucets on hand. |
 |
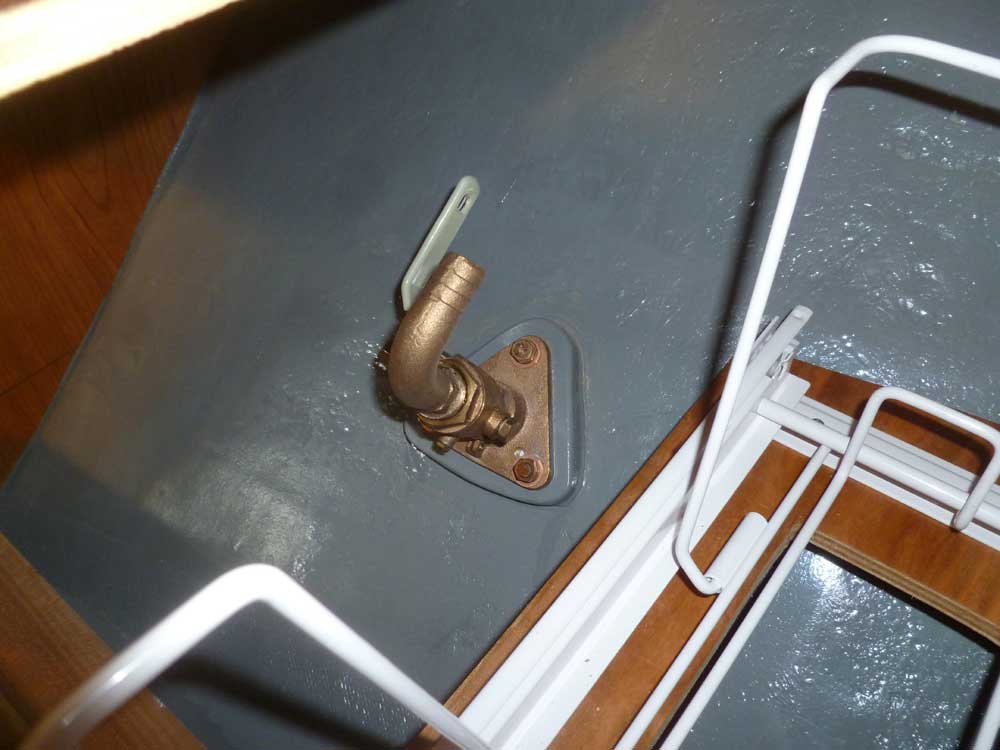
While I was in the area, and while things were still
convenient, I installed a 90° tailpiece on the galley
sink through hull, which I'd determined earlier would
give me the best lead for the sink drain. |
 |
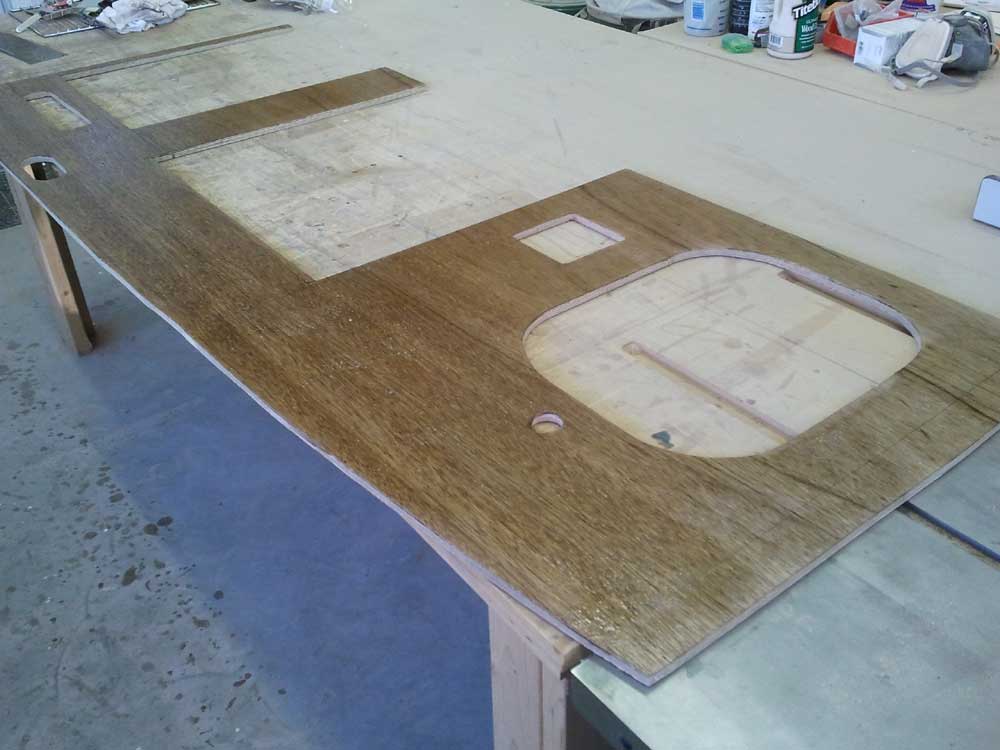
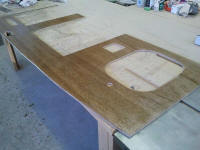
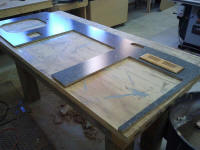
With the countertop removed and down in the shop, I
turned to the various final cuts and openings I needed
before I could install the countertop surface (Formica).
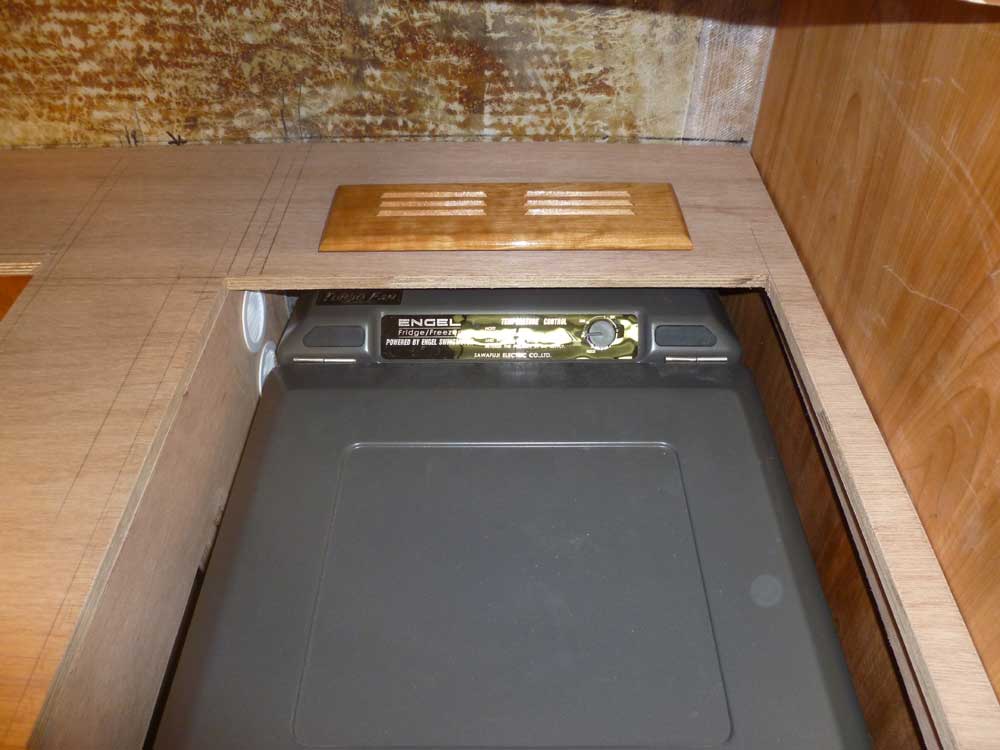
I made the cut for the wooden refrigerator vent;
somehow, the saw went off track, making this an ugly
cutout, but fortunately the wide overlap of the vent
would cover this error.
Nearby, I made a 2" wide, 6" long cutout directly above
the open space between the refrigerator and stove
bulkheads, through which I planned to run hoses and
wiring. This opening would provide the access for
these hoses and wires to run from their chase above the
countertop from the engine room (as related in an
earlier post) and into the hidden areas beneath the
cabinetry and countertop. This opening would be
hidden within cabinetry that I'd build on top of the
countertop once it was installed. |

 |
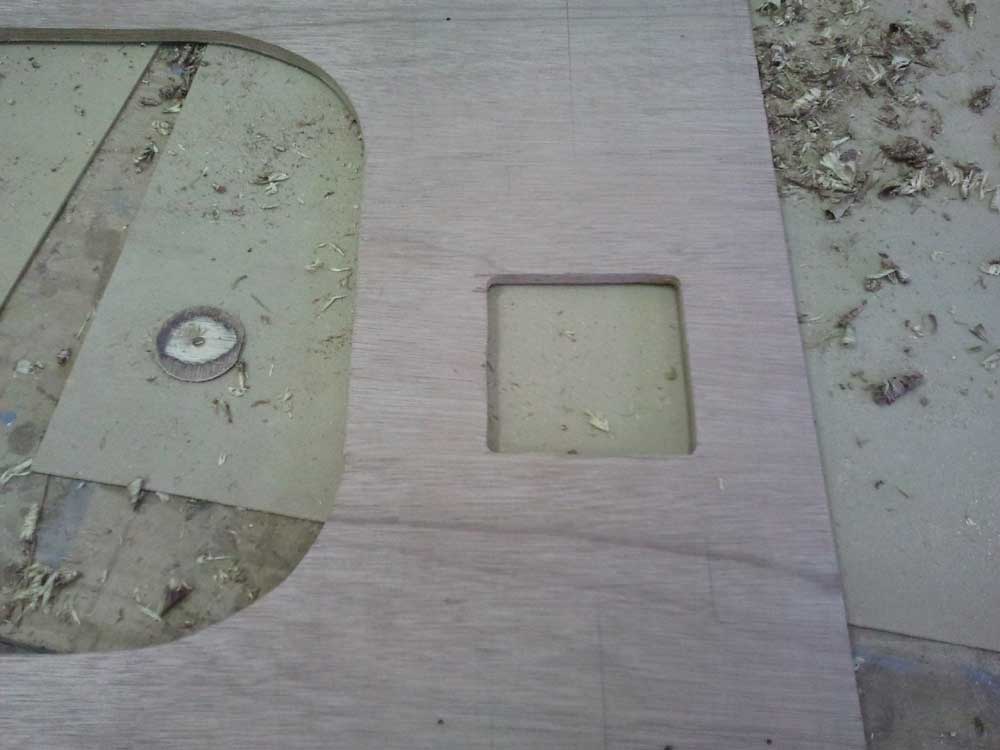
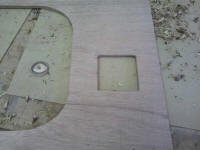
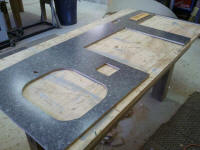
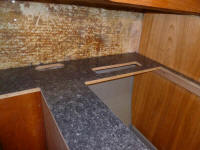
Between the stove and sink, I located the "scraping
block" opening. This didn't need to be overly
large, nor did I want it to be, and eventually I settled
on a cutout of 4.5" square, which, even with cleats to
support the lid, was wide enough to accept normal cans.
I centered the opening between the edge of the stove
trim (approximately) and the edge of the sink flange,
and over the center of the trash can when measured from
the countertop edge, and cut it out. I'd hoped to
use a router template for the cutout and the lid, which
would ensure a close fit, but didn't have the correct
bit on hand. Sometime later, I'd build a lid that
would fit the opening closely, but I didn't have to do
that now. |
 |
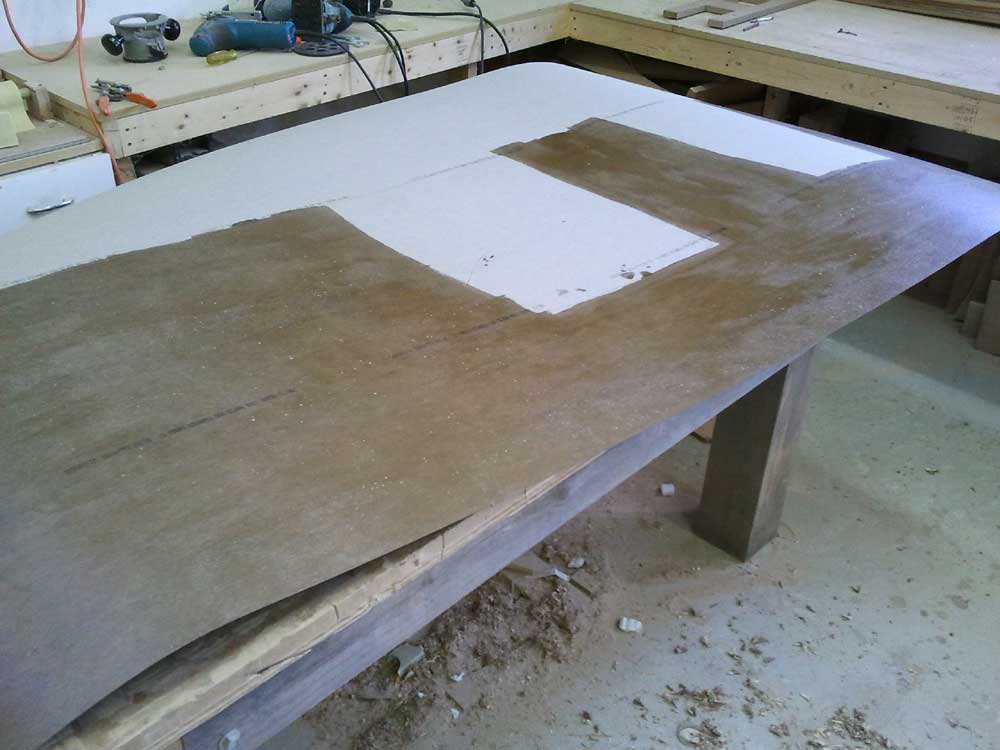
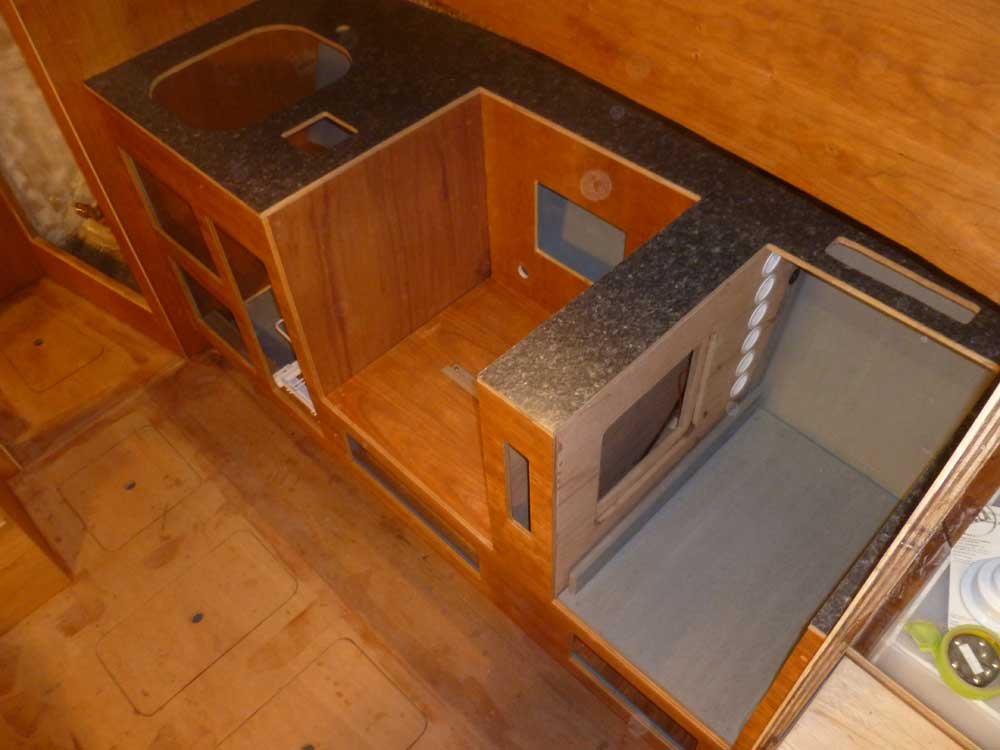
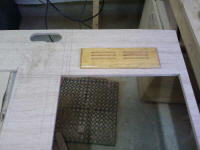
With these preparations complete, I installed the
Formica countertop surface, in the normal way using
contact cement (two coats on the plywood). The
color is "midnight stone", Formica # 6280-46. |

 |
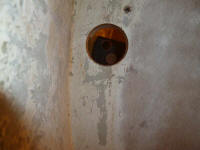
I had one final step before I could install the
countertop permanently: drill a hole in the
forward galley bulkhead for the eventual continuation of
the PVC conduit that I'd installed behind the stove.
This was simple enough. I didn't install the
conduit at this time, as I lacked fittings, and there
was no need, as I could install this later. But
drilling the hole was much easier now. |
 |
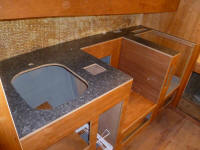
I dry-fit the countertop one last time to ensure that it
still fit as required after installing the laminate top. |

 |
Finally, I installed the countertop in a bed of
adhesive, using clamps and various weights to hold it in
place while the adhesive cured overnight. |
 |
I'd considered various countertop materials during the
weeks leading up to this point, from stone to solid
surface to stainless steel, but as the galley came
together, and I realized how small the overall surface
would be, none of these other choices seemed worthwhile,
and all would involve subcontractors, delays, headaches,
and additional cost--all factors that are sometimes
worthwhile for a desired end result, but in this case
there was no justification. While ideally
I'd have ended up with a heat-resistant surface (stone
or stainless), in the end this just wasn't a worthwhile
pursuit given the specifics of the galley as it
eventually came together. I was very pleased with
the Formica color we chose, which replicated a stone
surface surprisingly well (even to the point of
texture), and was simple to install. I really
liked it. |
| |
| |
Total Time Today: 6.25 hours
|
<
Previous |
Next > |
|
|