Project Log: Sunday, June 17, 2012
Next on my agenda was to install the fresh water pump
and make a number of connections for the water system
inside the starboard utility space outboard of the
engine room, which I'd chosen as "water central".
Since the fresh water system and diesel heating system
(Webasto) were closely related in terms of hot water
production and supply, I spent some time beforehand
reviewing my plans and available components and
preparing updated sketches (and sketches were all they
were) for both systems to ensure I was prepared, which
inevitably led to a round of plumbing supply ordering.
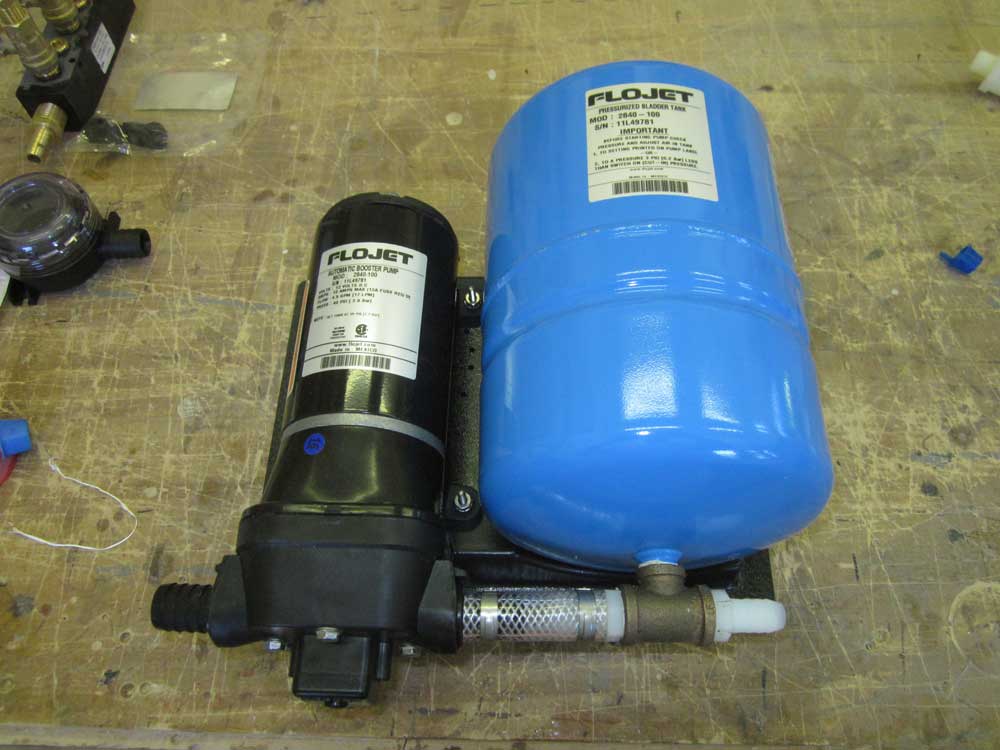
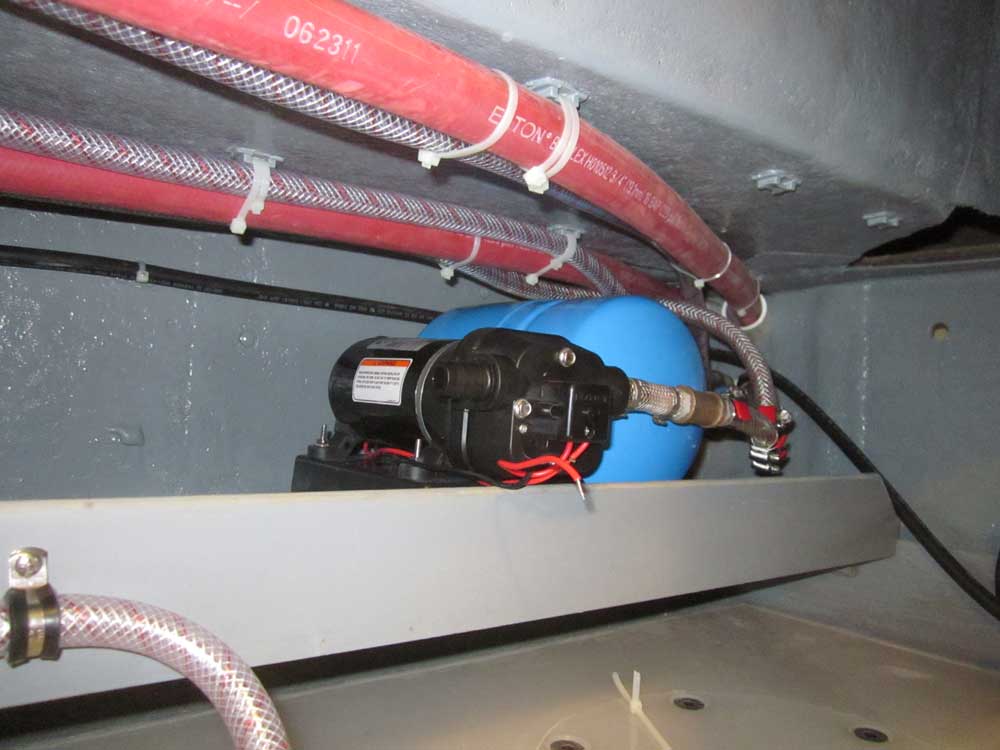
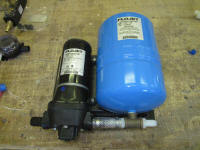
I selected a Flojet fresh water pressure pump combined
with an accumulator tank on a built-in platform.
In addition, I planned full system filtration for both
pressure and manual supply sides. |
 |
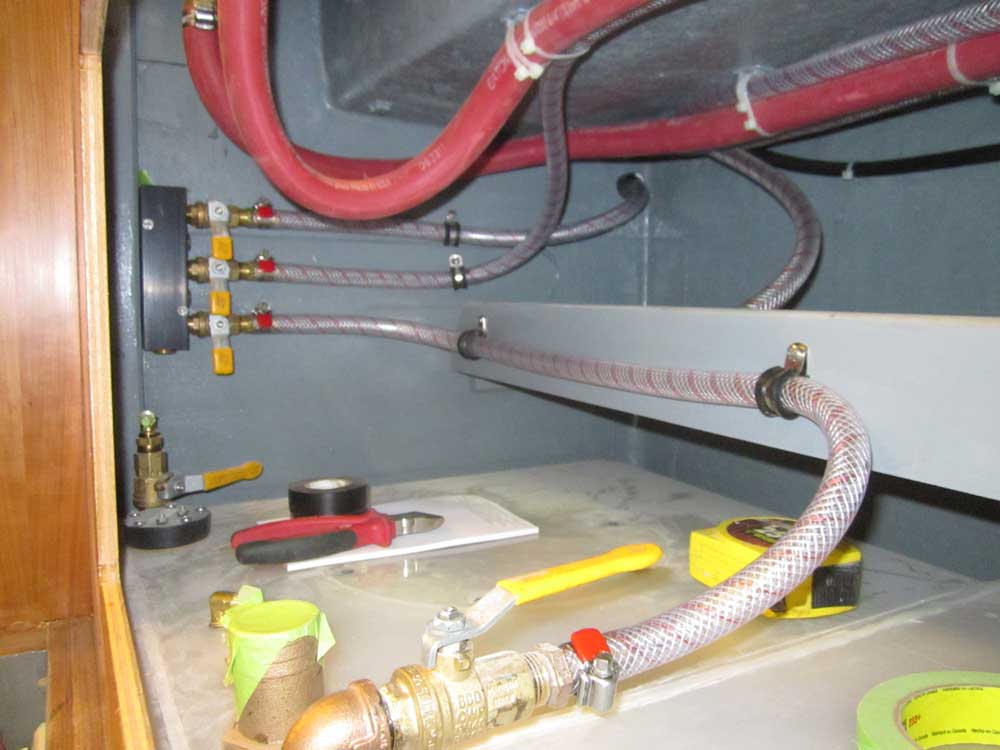
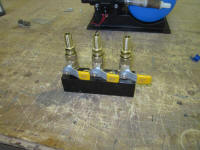
To distribute the water from the three fresh water
tanks, I built a manifold from off-the-shelf parts.
Because of a last-minute change in the system, as of
this writing I was awaiting a 3/4" hose connector for
the manifold's outlet, since the initial part of the
water system (including the pump inlet) required 3/4"
hose versus the 1/2" I'd used throughout. |
 |
There was good space for the pump, accumulator, and
other components on the shelf I'd previously installed
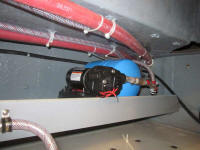
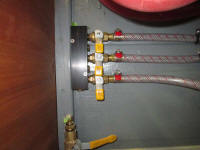
in the space. Typically, as I began to consider
mounting the pump I realized that I had several things I
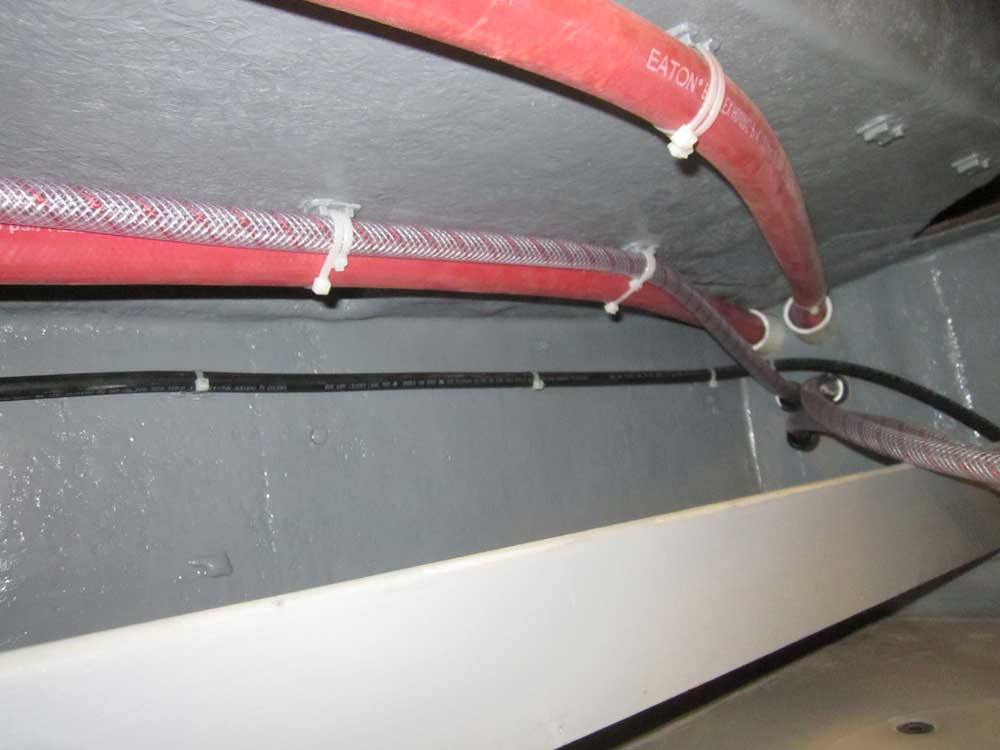
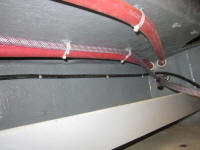
needed to do first. Specifically, it made sense to
run the hoses to and from the expansion tank for the
hydronic heating system, as the only logical way in and
out of this space was through a small bulkhead just aft
of the proposed pump location, where I'd previously run
some of the fresh water hoses. (This photo is jumping
ahead a bit, but shows the red heater hoses running
through the bulkhead.) |
 |
Setting aside, for now, the water pump, I prepared two
holes through the bulkhead for the 3/4" heating hose
required for the expansion tank. While I was at
it, I drilled a third, smaller hole further down (just
above the tankage tops) for the starboard fuel tank's
supply line, which would later run through there on its
way to the fuel manifolds in the engine room; but I
didn't run this hose now.
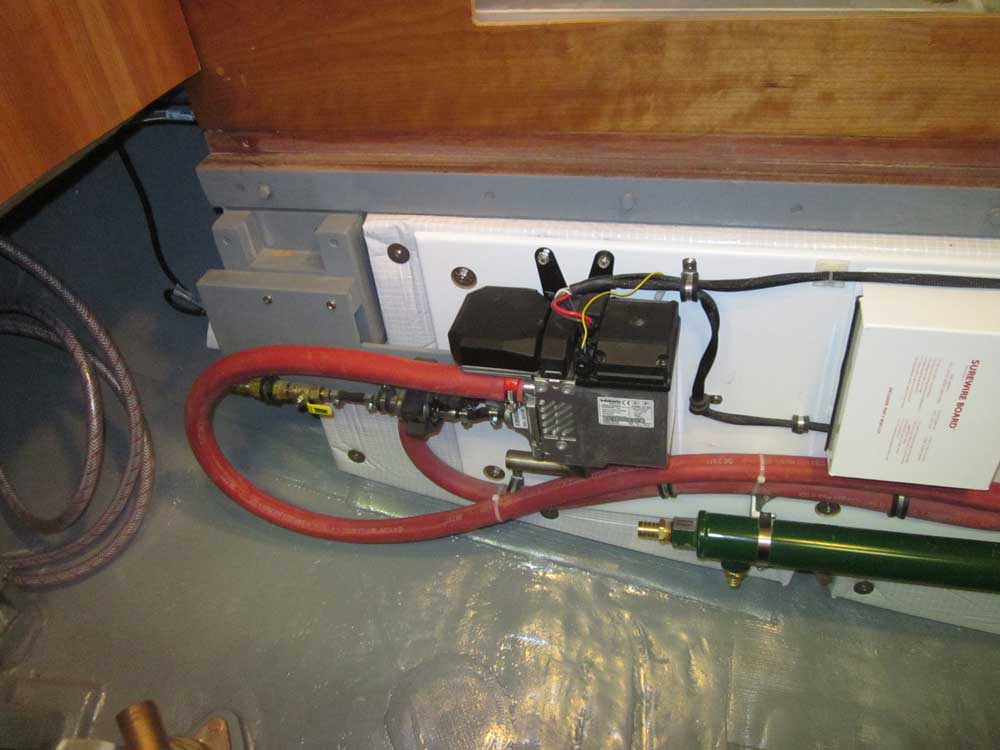
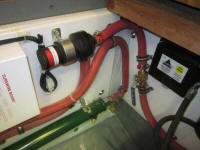
With the large holes ready, I ran lengths of the stiff
heating hose in . The run inside the utility space
was easy enough, but leading one of the hoses around to
the opposite side of the engine room to connect with the
heating system's circulation pump required thought and
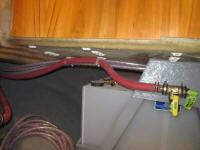
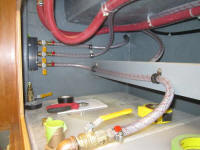
plenty of hose. Eventually, I led the hose around
the top edge of the engine room to starboard and across
the forward end, before diving the hose below the oil
filter, through a system maintenance shutoff valve, and
to the inlet of the pump itself.
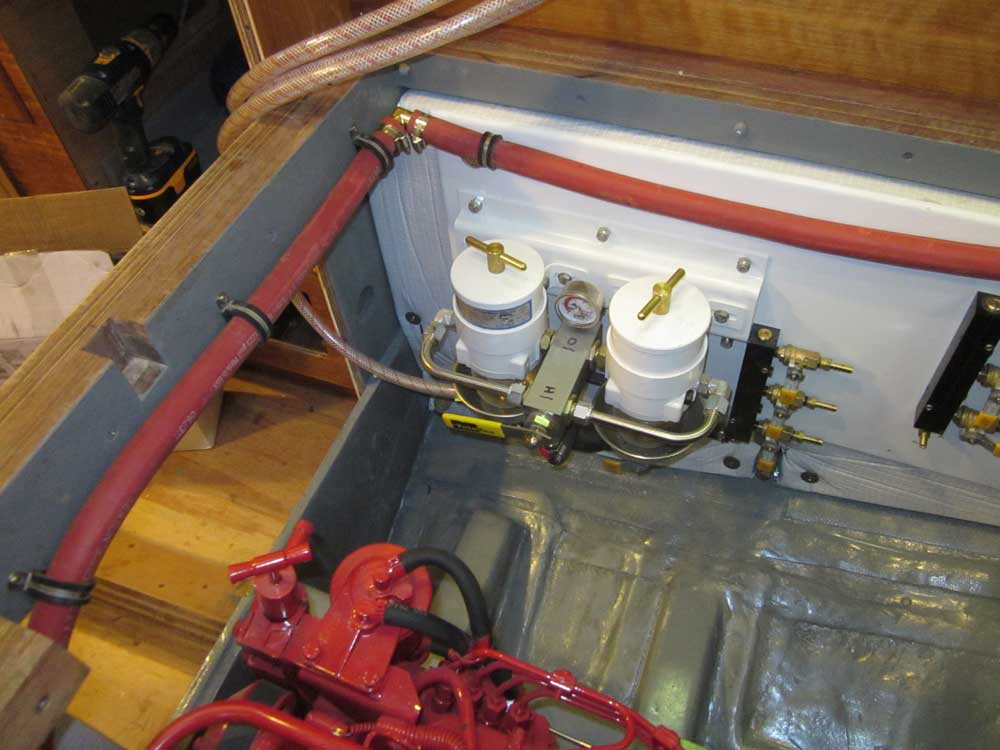
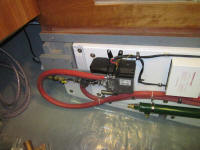
This valve turned out to be a challenge to install, as
the hose barbs were essentially too large for the hose
(despite being a 3/4" valve), and significant effort was
required to force the hoses on. I had another one
of these valves on hand that I'd planned to use
somewhere, but I thought I'd find something else that
worked better. After these photos, I added another
line clamp on that droopy hose above the fuel filters in
the lefthand photo.
|

 |
Truth be told, part of the reason for this particular
route was because I first mistakenly connected this hose
carefully to the forward side of the heating system's
engine heat exchanger, realizing afterwards that this
was in error (I had it properly led on my sketch, so I
don't know why I led it the way I did), so I had to work
with what I'd already started since the hose was all cut
and secured everywhere.
Despite my frustration at the mistake, it was an
easy-enough fix since I could connect the end of the
hose to the shutoff valve as suggested in the overall
plan, which allowed me to lengthen the hose as required
to reach the pump. Also, the hose required a
fairly wide bend radius, and no elbows or other fittings
close to the pump, so the new route worked out well in
the end despite it all.
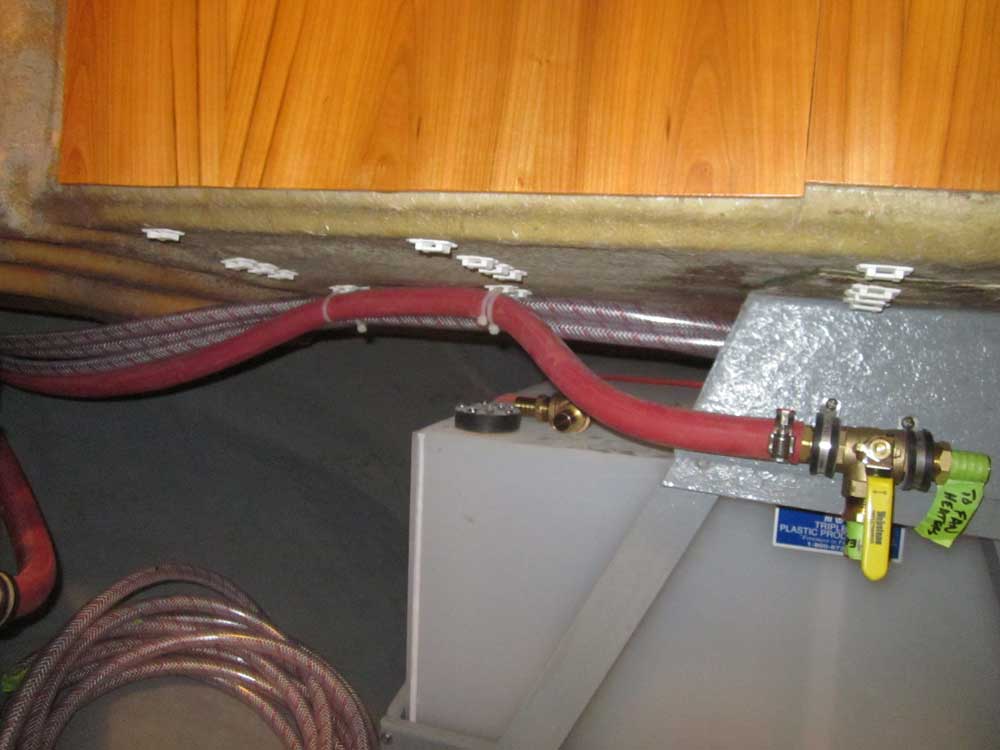
I led the second hose to the expansion tank aft to a
three-way (i.e. "summer") valve that I placed just
forward of the after fuel tank. This valve, once
the whole system was connected, would allow the diesel
boiler to heat only the water tank during non-heating
months, rather than circulating through the entire
system. I'd connect other sections of the heating
hose to this area later, but for now I'd accomplished
what I needed to--and besides, I'd used up most of my
supply of hose. |

 |
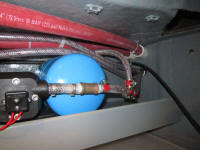
With a small section of hose remaining, I installed the
line running from the boiler to the long heat exchanger
below. Later, I'd figure out how to secure the
loop of hose leading to the boiler, but I needed to keep
it free for the moment to ensure I could route properly
the air intake and exhaust for the boiler later. I
might shorten the loop, and I think I meant to put a
shutoff valve in there, but more on that later as it
happens. Anyway, I wasn't about to use the shutoff
valve I had on hand, after my experience with its
counterpart earlier. |
 |
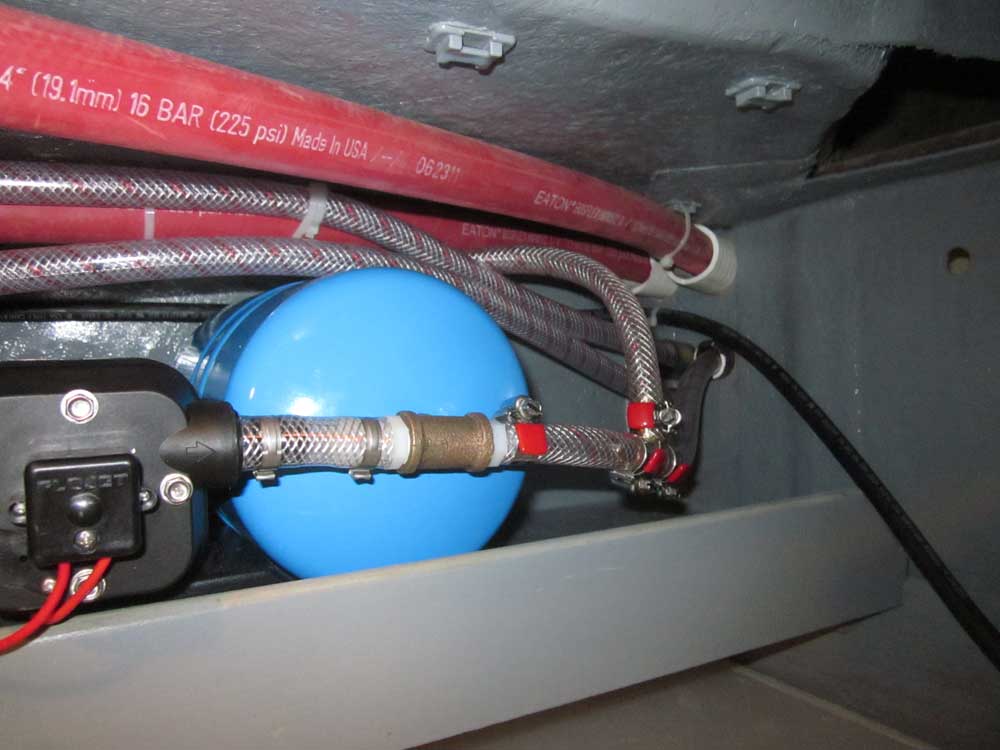
The lengthy tangent completed, I turned once more to the
water pump. Installation was easy--four screws
through little rubber mounts in the platform. Once
the pump was in, I could install the lines to its
outlet: a short hose leading to a tee fitting, which
branched the water supply off to the cold pressure
faucet at the galley sink (and later the shower), and
across the boat to the water heater. |
 |
After various considerations, I mounted the water supply
manifold on the forward bulkhead of the space, where it
was convenient for the hose connections required.
As I mentioned earlier, I didn't have the proper fitting
for the discharge end of the manifold, so I'd install
that later, but now I could connect supply lines from
each of the three water tanks: two longer runs
that I'd prepared earlier, plus a short hose run to the
nearby starboard water tank. |
|
| |
Total Time Today: 6.5 hours
|
<
Previous | Next > |
|
|